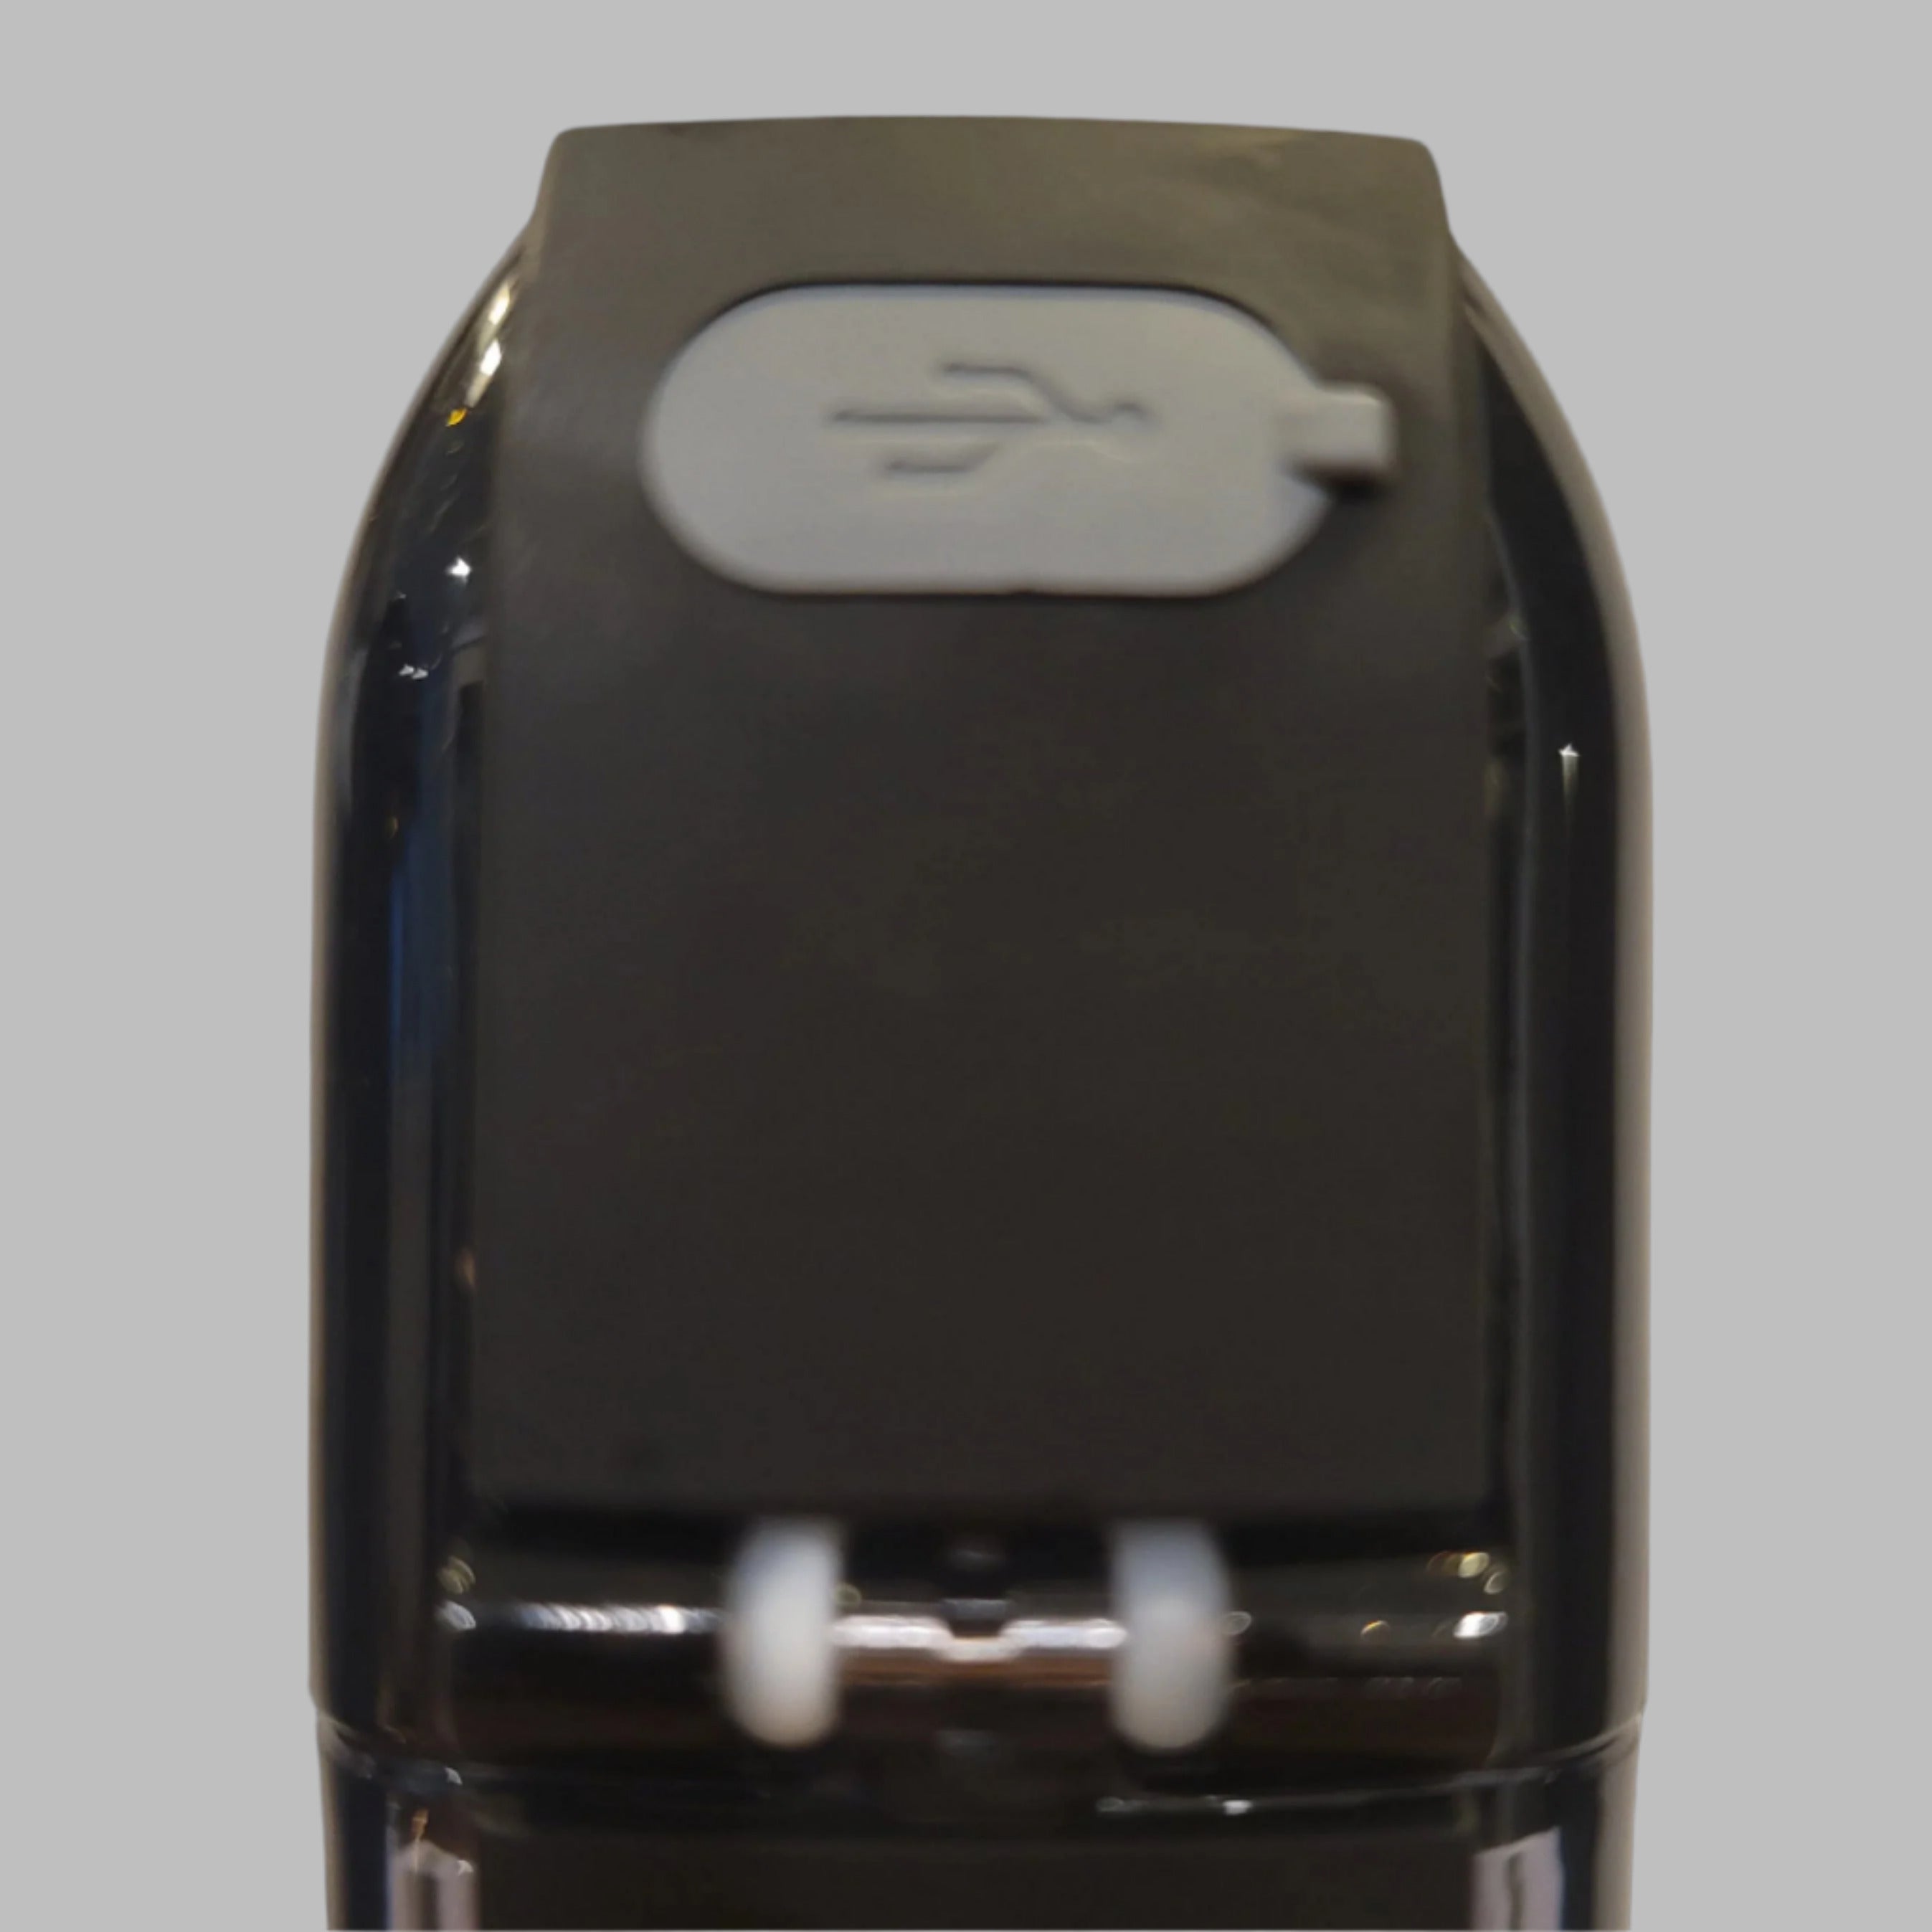
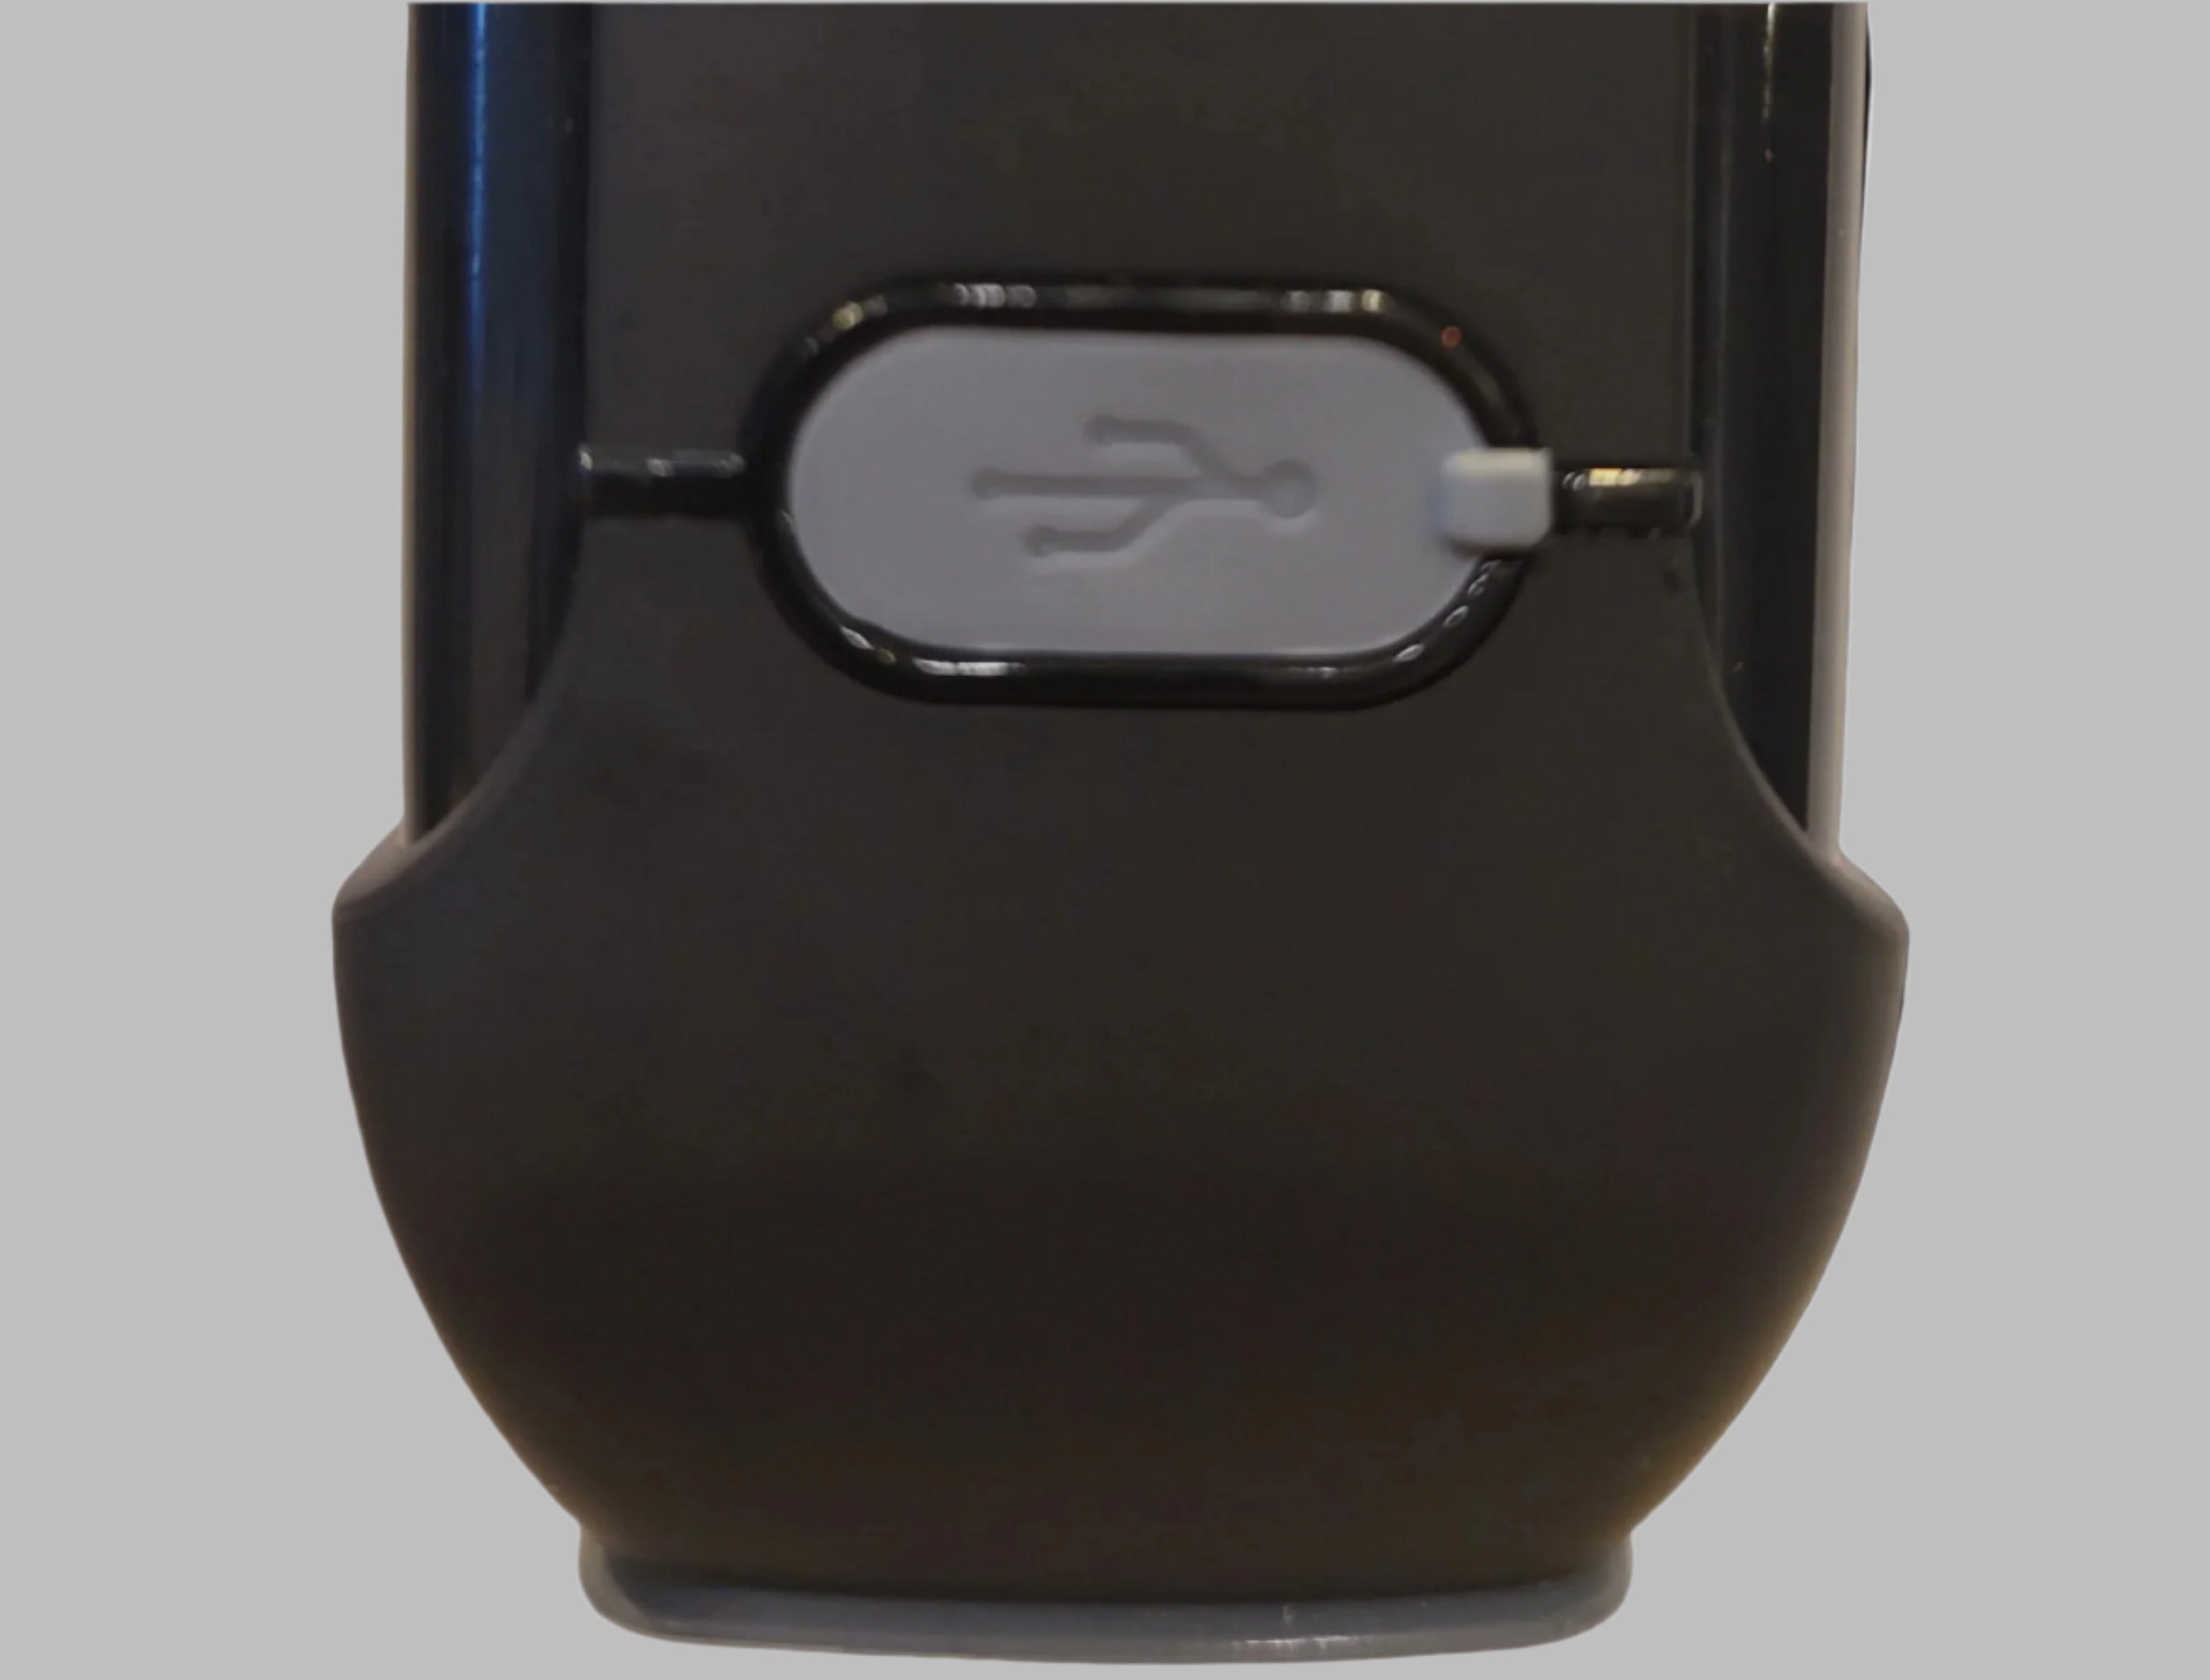
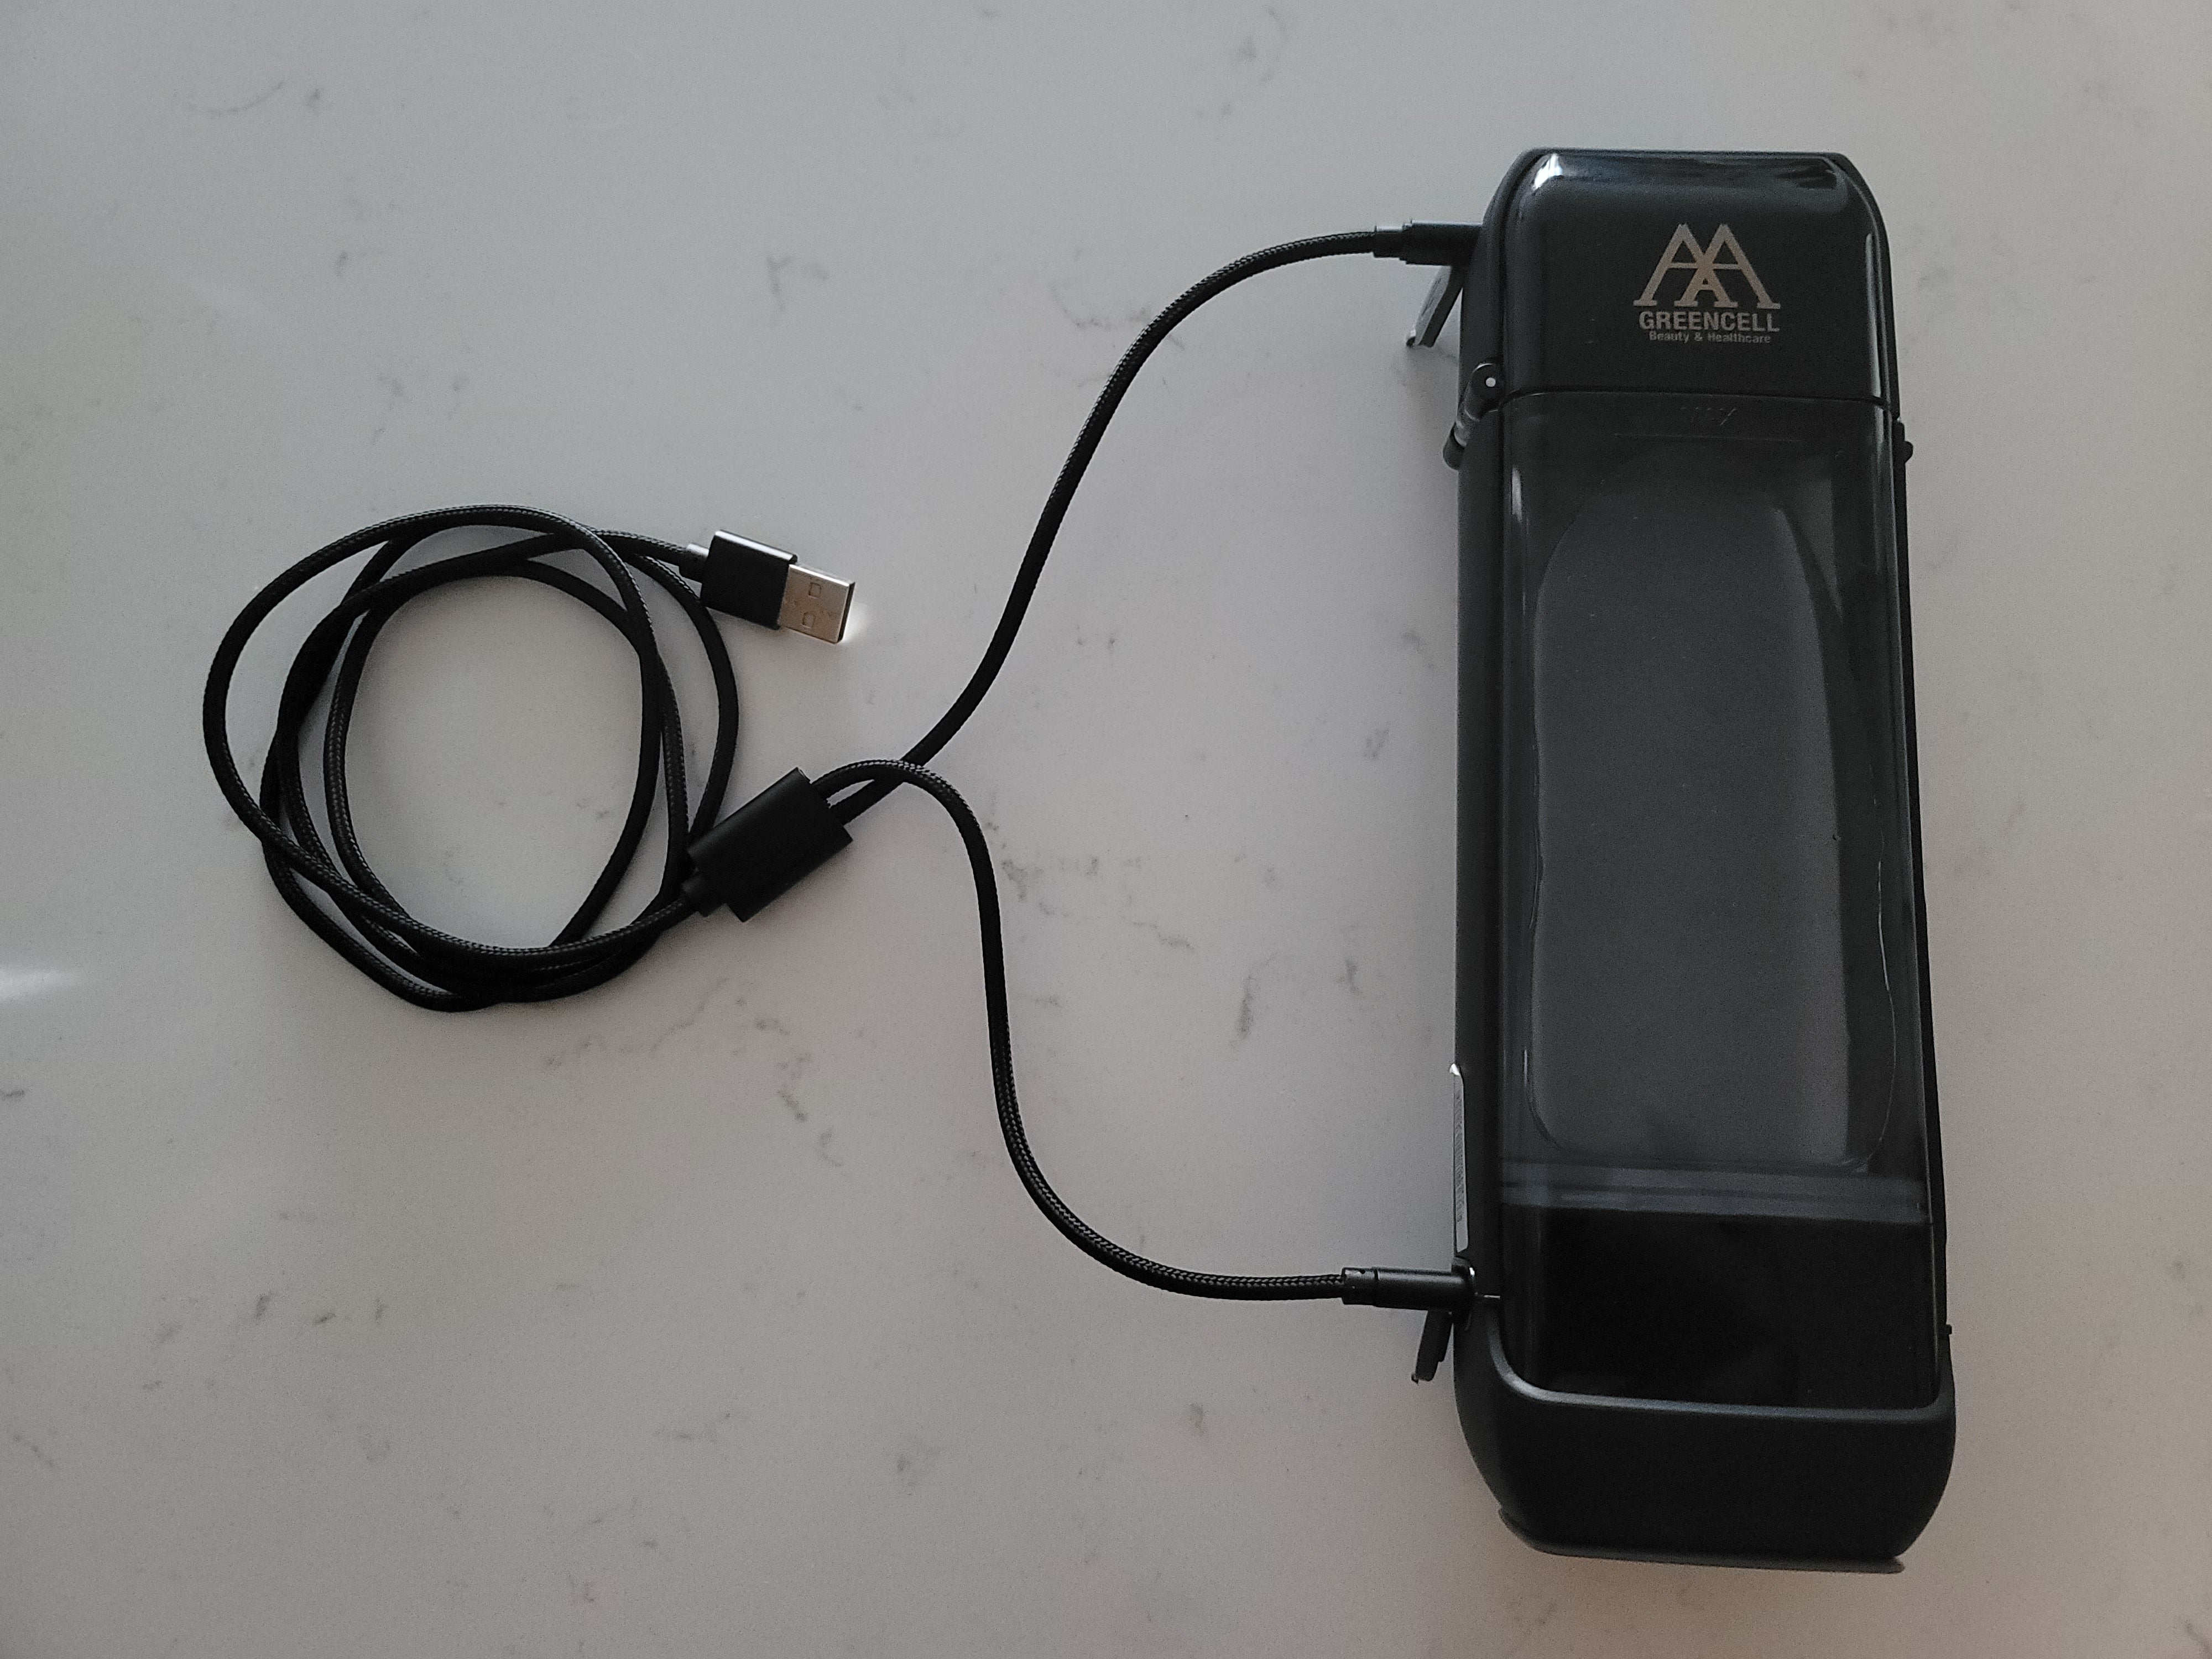
- Fully charge the device using the USB-A to dual USB-C charging wire.
- Plug the USB-C wires into both the top and bottom charging ports.
- All lights will turn fully blue when charging is complete.
- Do NOT overcharge the battery by charging overnight.

- Fill the bottle halfway with warm water and let it sit for 20 minutes to activate hydrogen production.
- After 20 minutes, fill the bottle up to the fill line and close the lid. Ensure the locking mechanism is in the unlocked position before closing.
- Slide the locking mechanism down to lock the bottle after closing the lid.
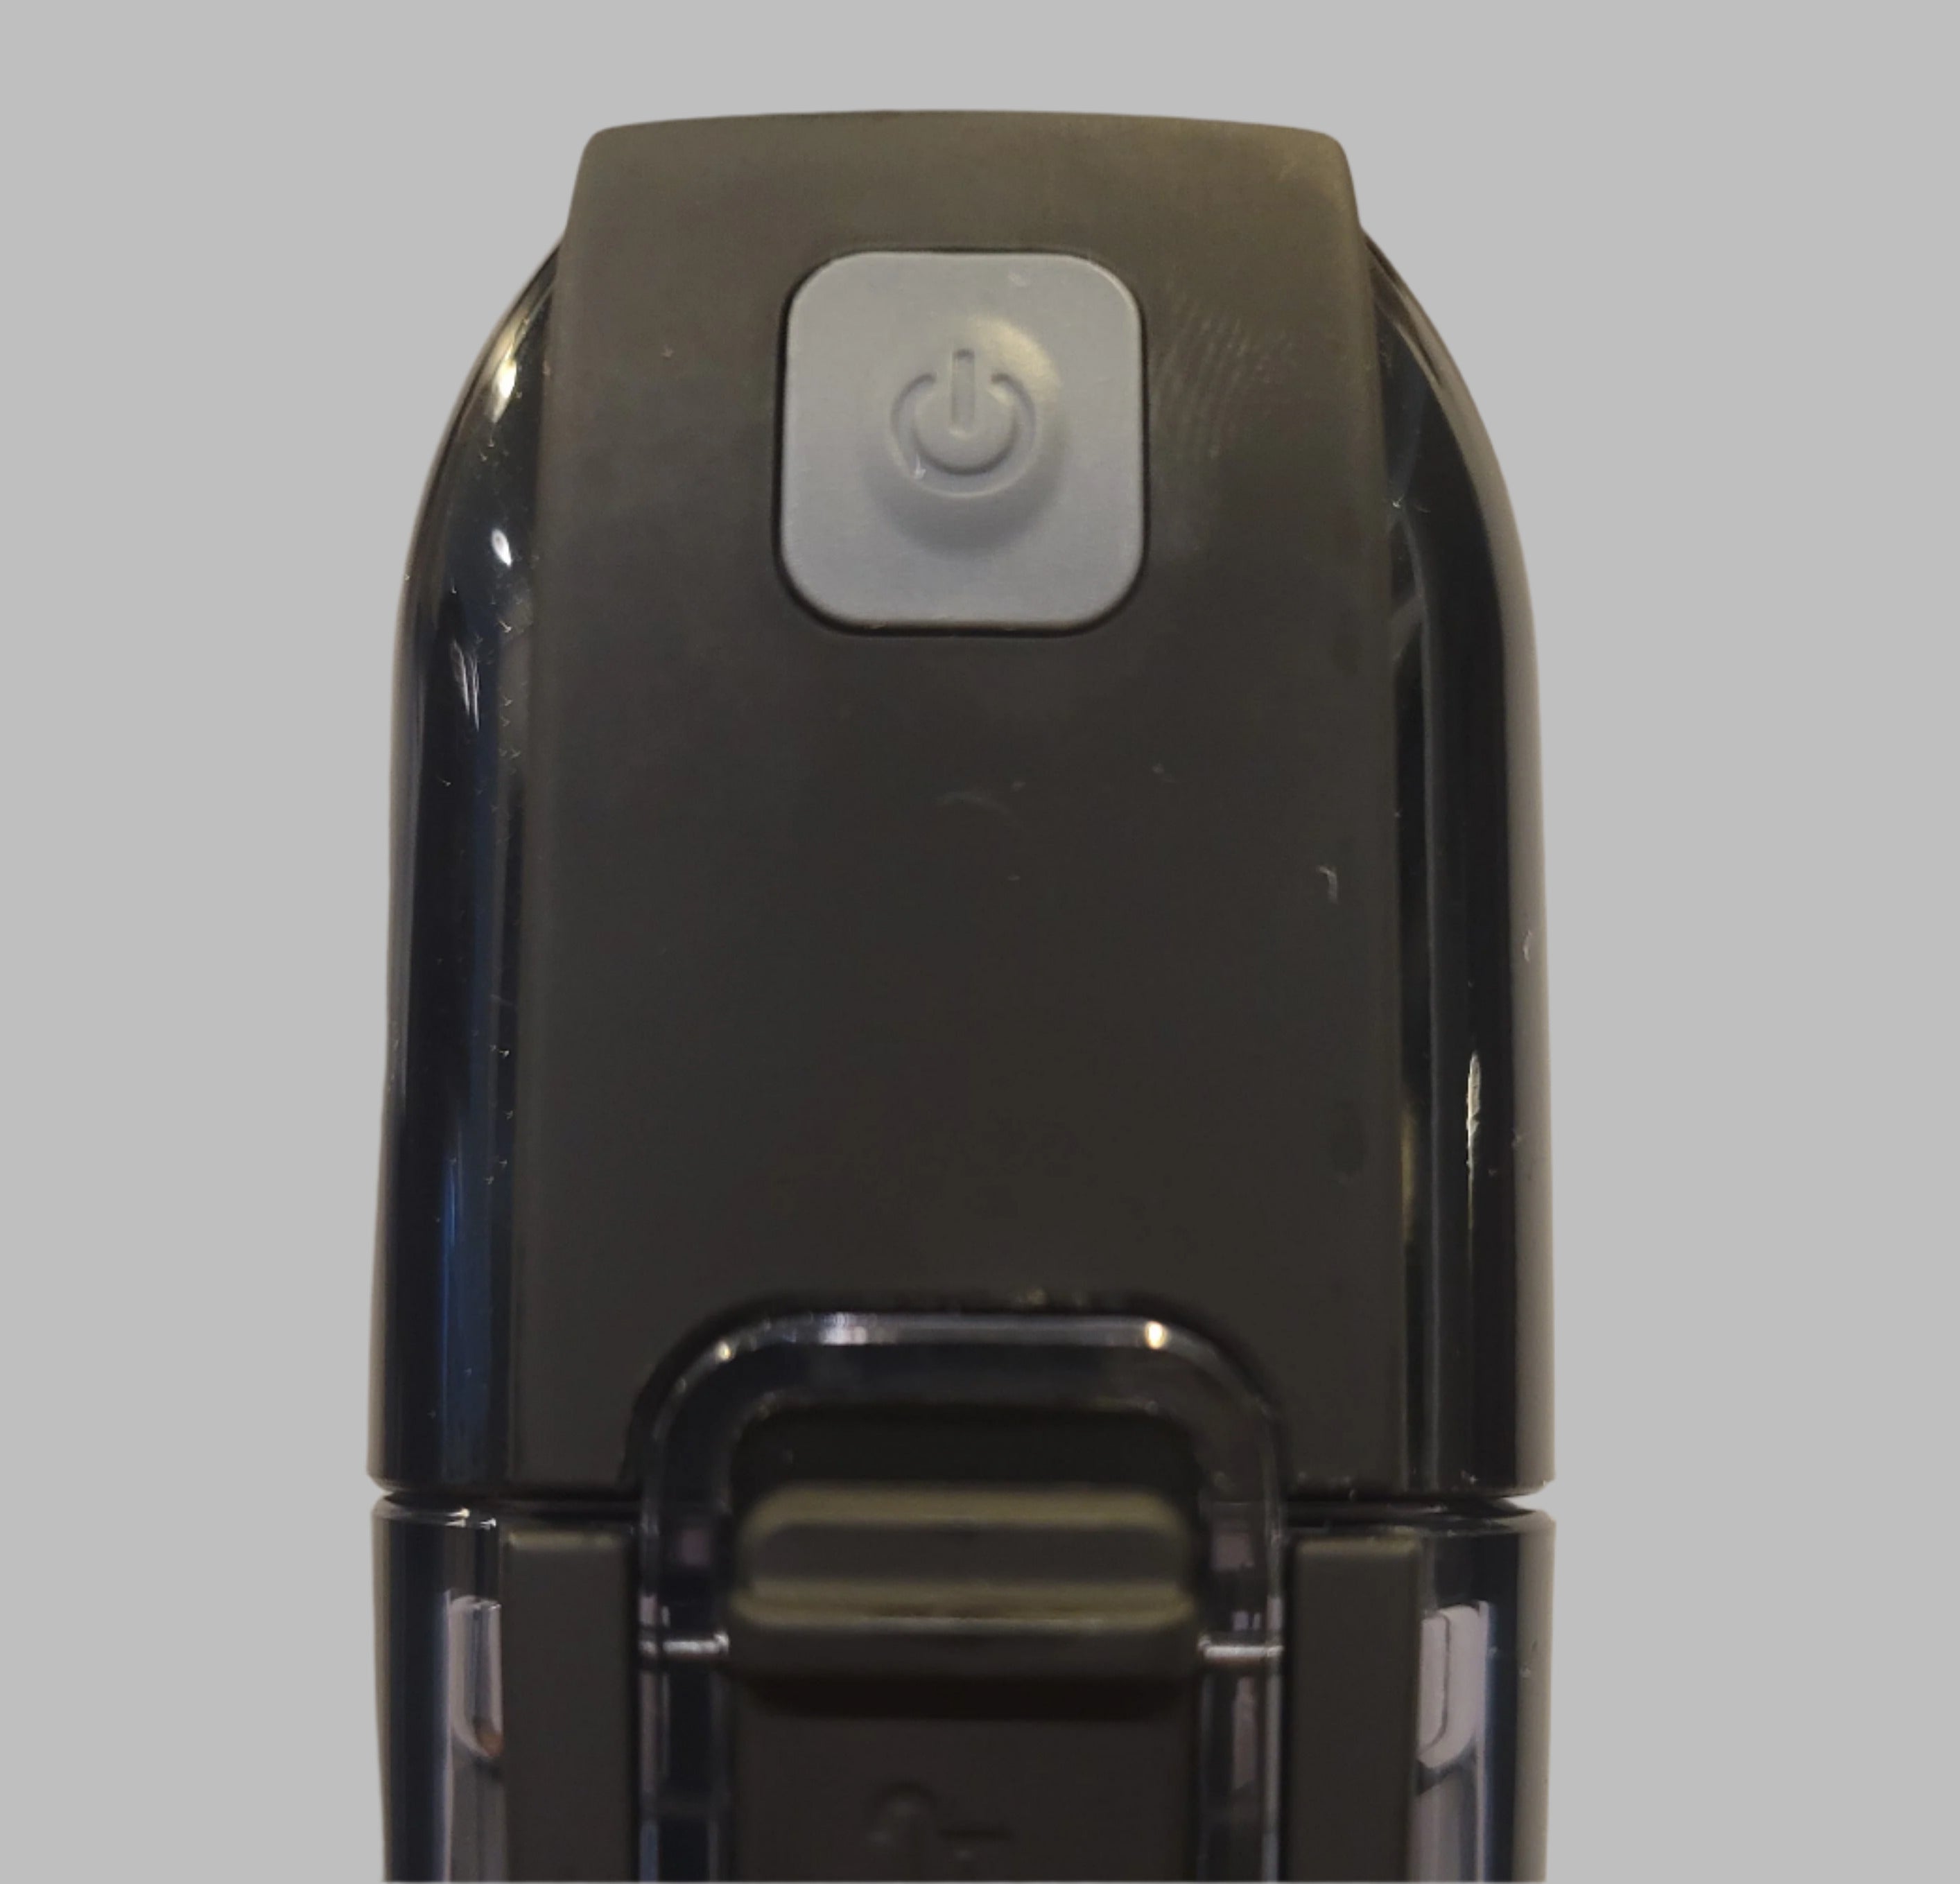
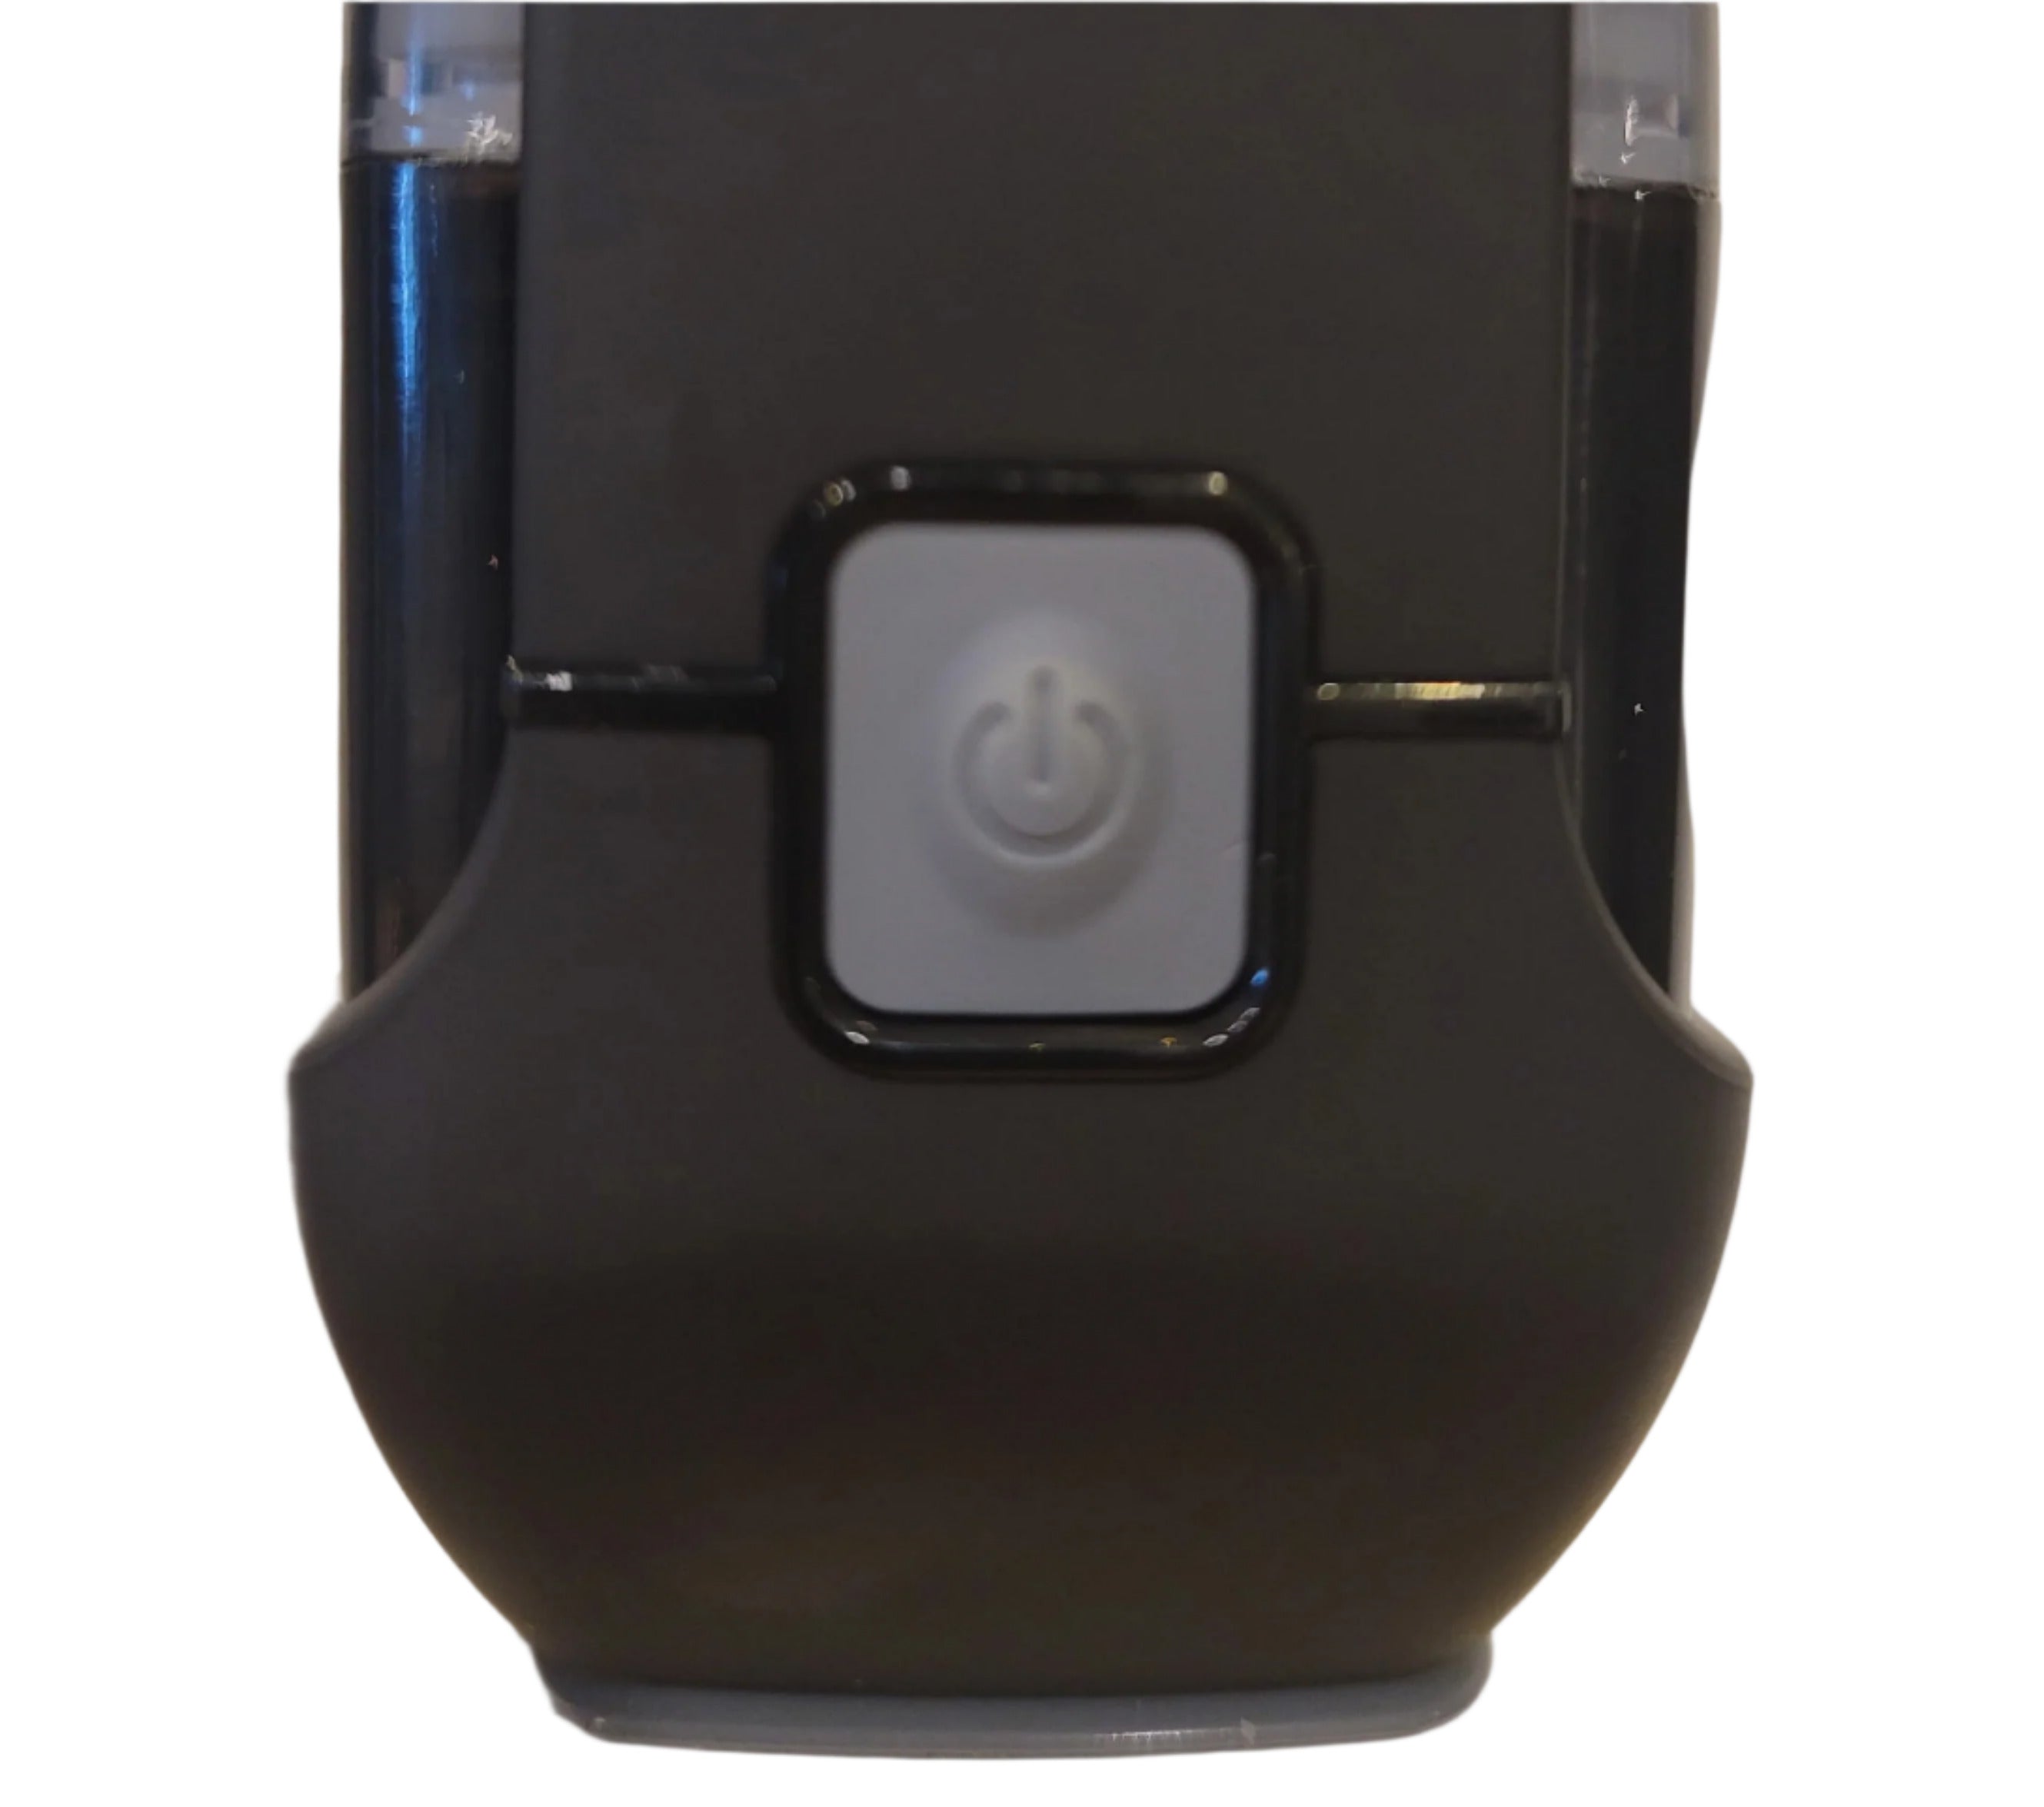
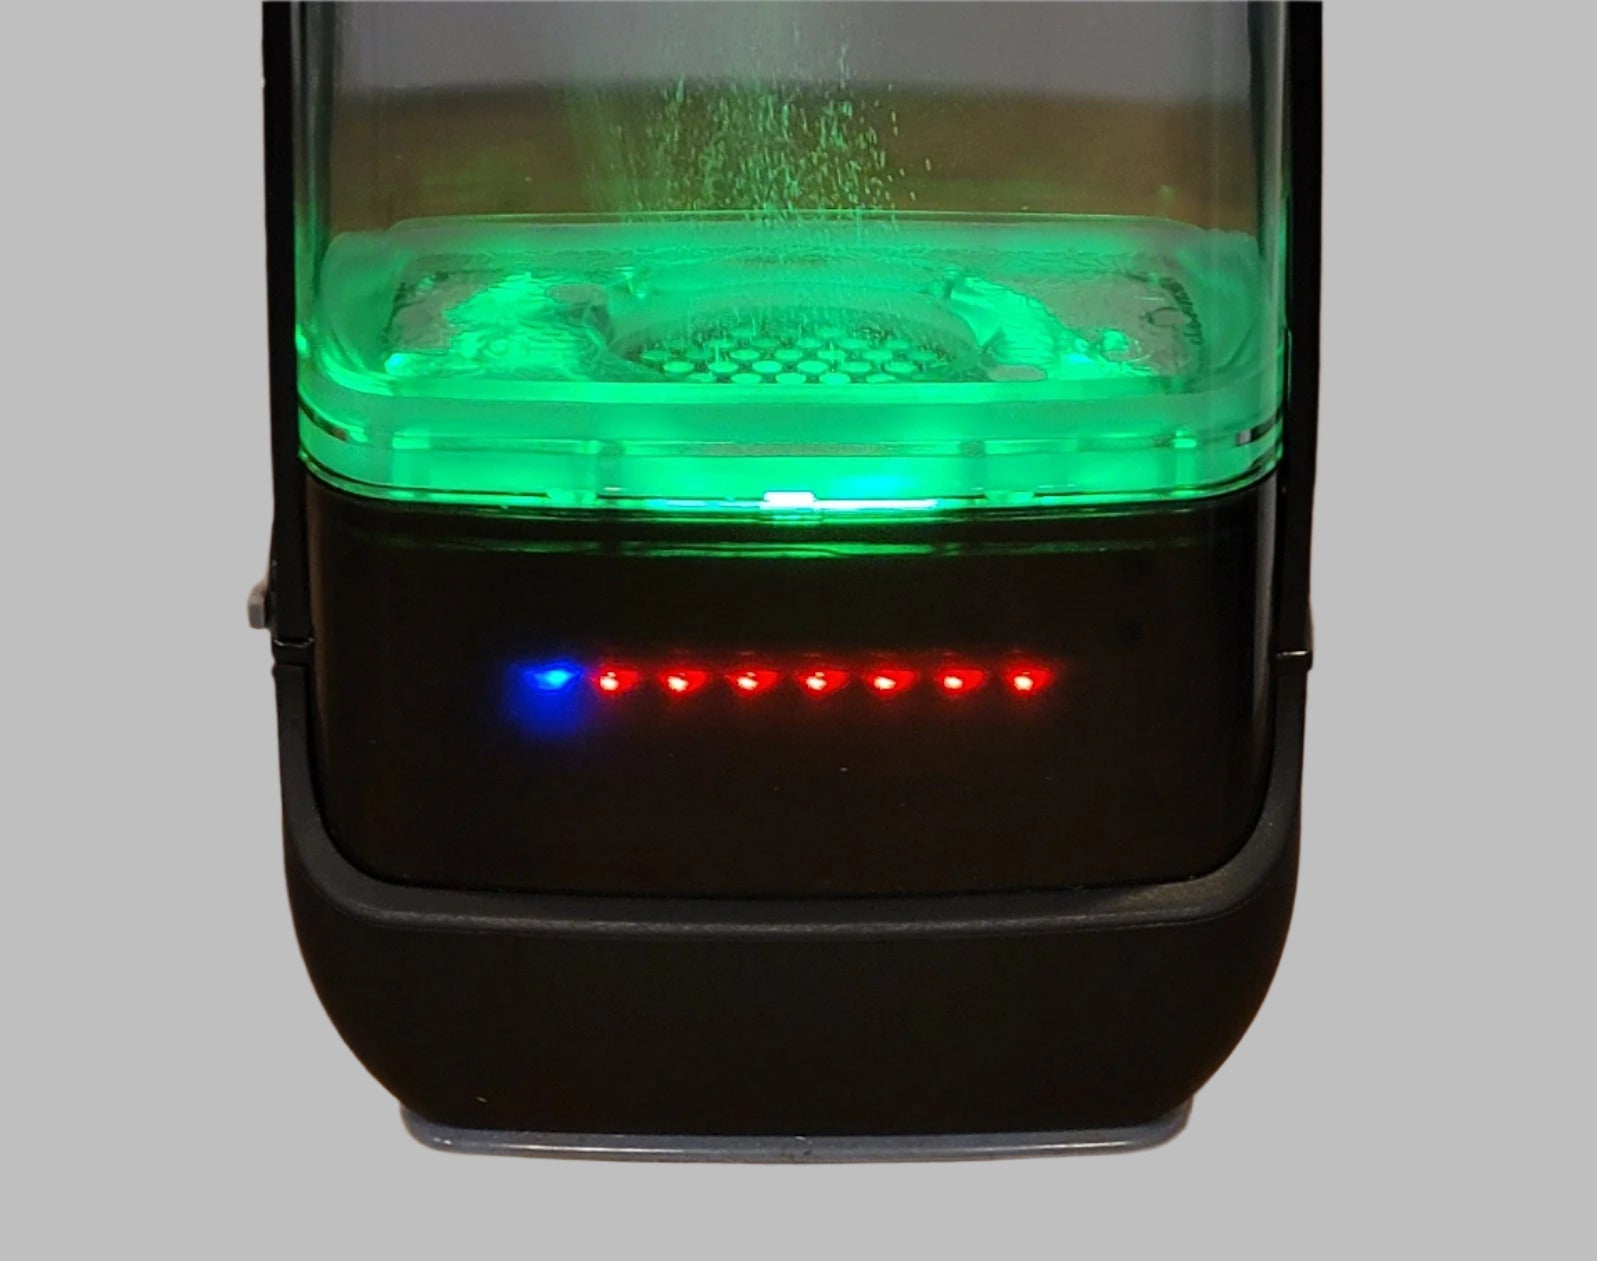
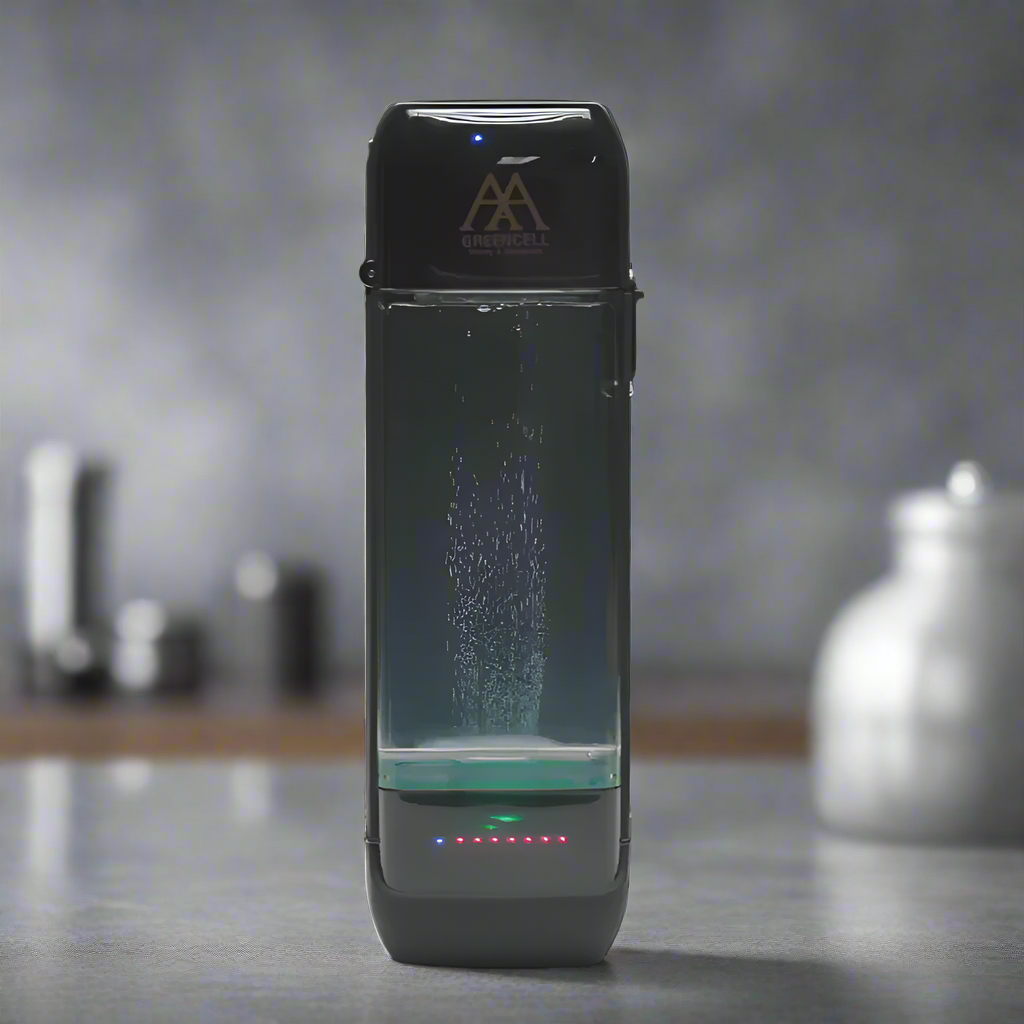
- Press the bottom power button to start the hydrogen cycle, indicated by bubbling and a green LED light. This lasts three minutes.
- Once complete, unlock the bottle by sliding the locking mechanism up and pressing it to release the latch.
- Open the bottle and discard the water.
- Your processor is now ready to use.
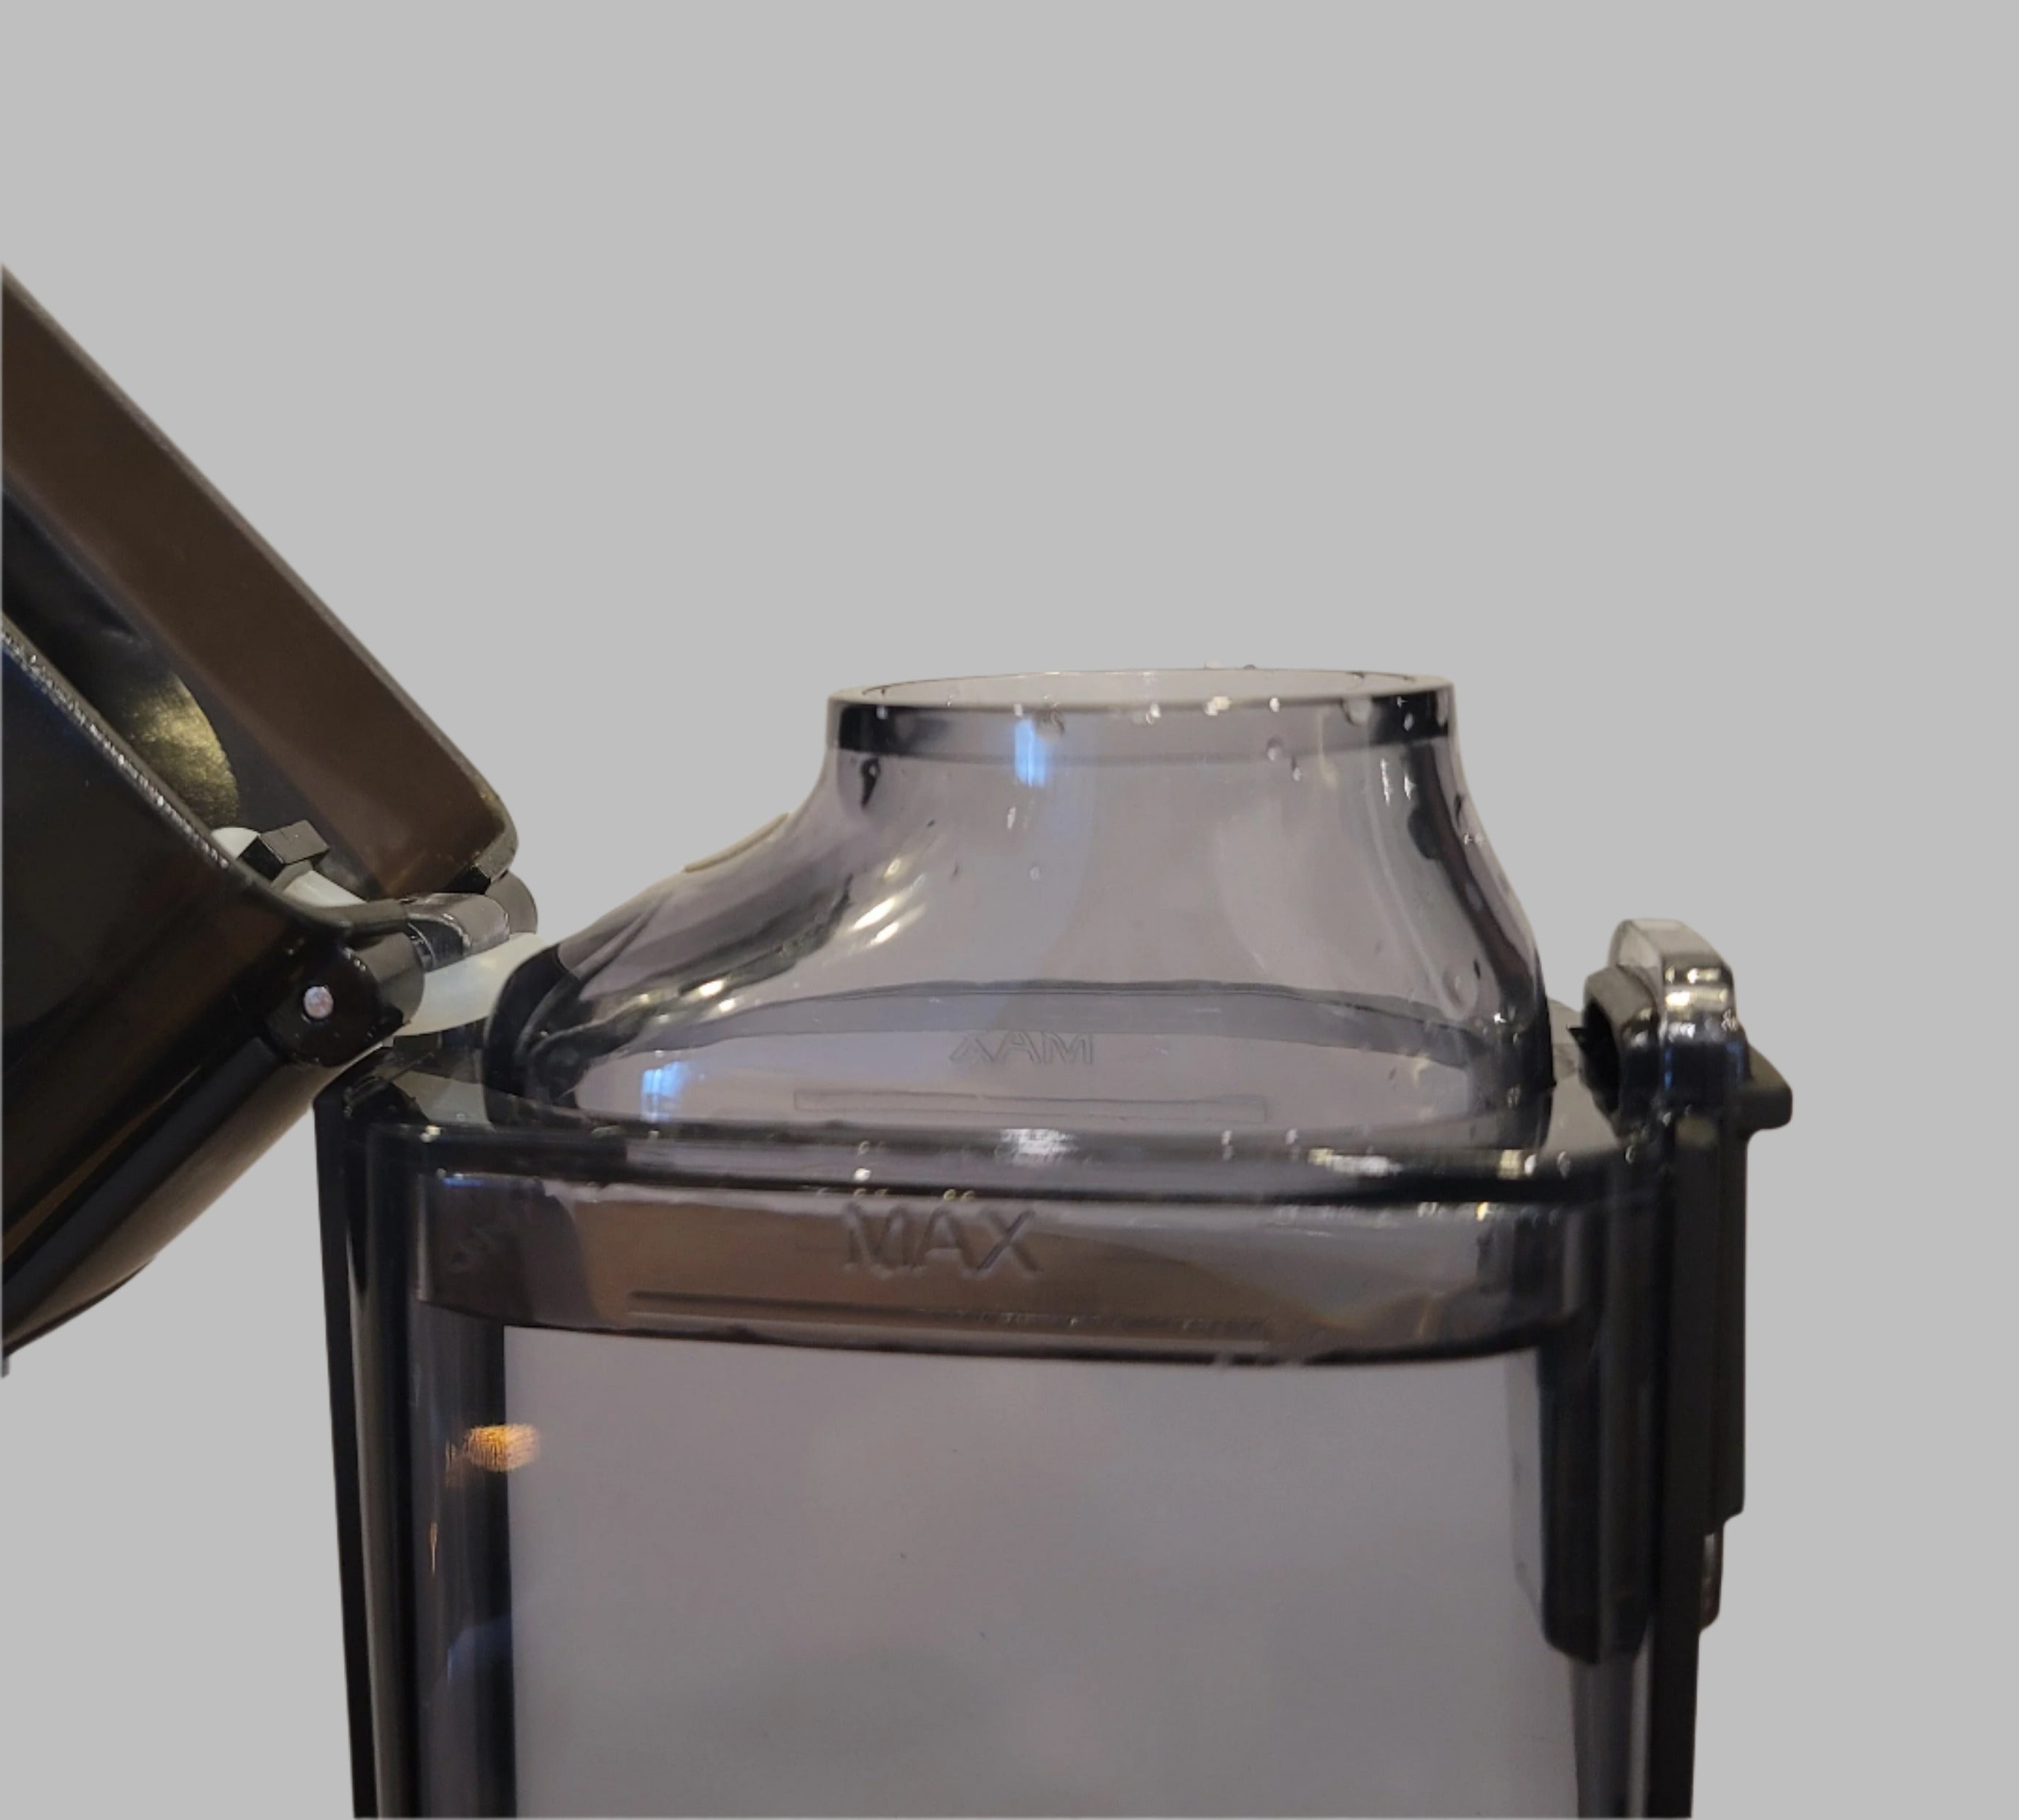
- Fill the unit to the fill line with room temperature water and close the lid.
- Lock the device by sliding the locking mechanism down.Press the top and bottom power buttons at the same time to start the cycle, which takes three minutes. Running both simultaneously saves time.
- Look for three blue blinking lights, green LED lighting, and bubbling inside the unit. The process is complete when all lights turn off.
- Slide the locking mechanism up and press to unlock and open the top, then pour the water into a glass to drink. (Do NOT drink directly from the unit.)
- Use only natural spring or filtered water. Avoid water with a pH higher than 8.5 and do not put any other substances in the unit.
- Never run the unit without water as it can damage the mechanism and void the warranty.
During hydrogen water production, wastewater containing ozone and chlorine accumulates in the collection cup at the bottom of the unit. If you notice water leaking from the bottom during a normal cycle, this means the cup is full, which is normal.
To empty the cup:
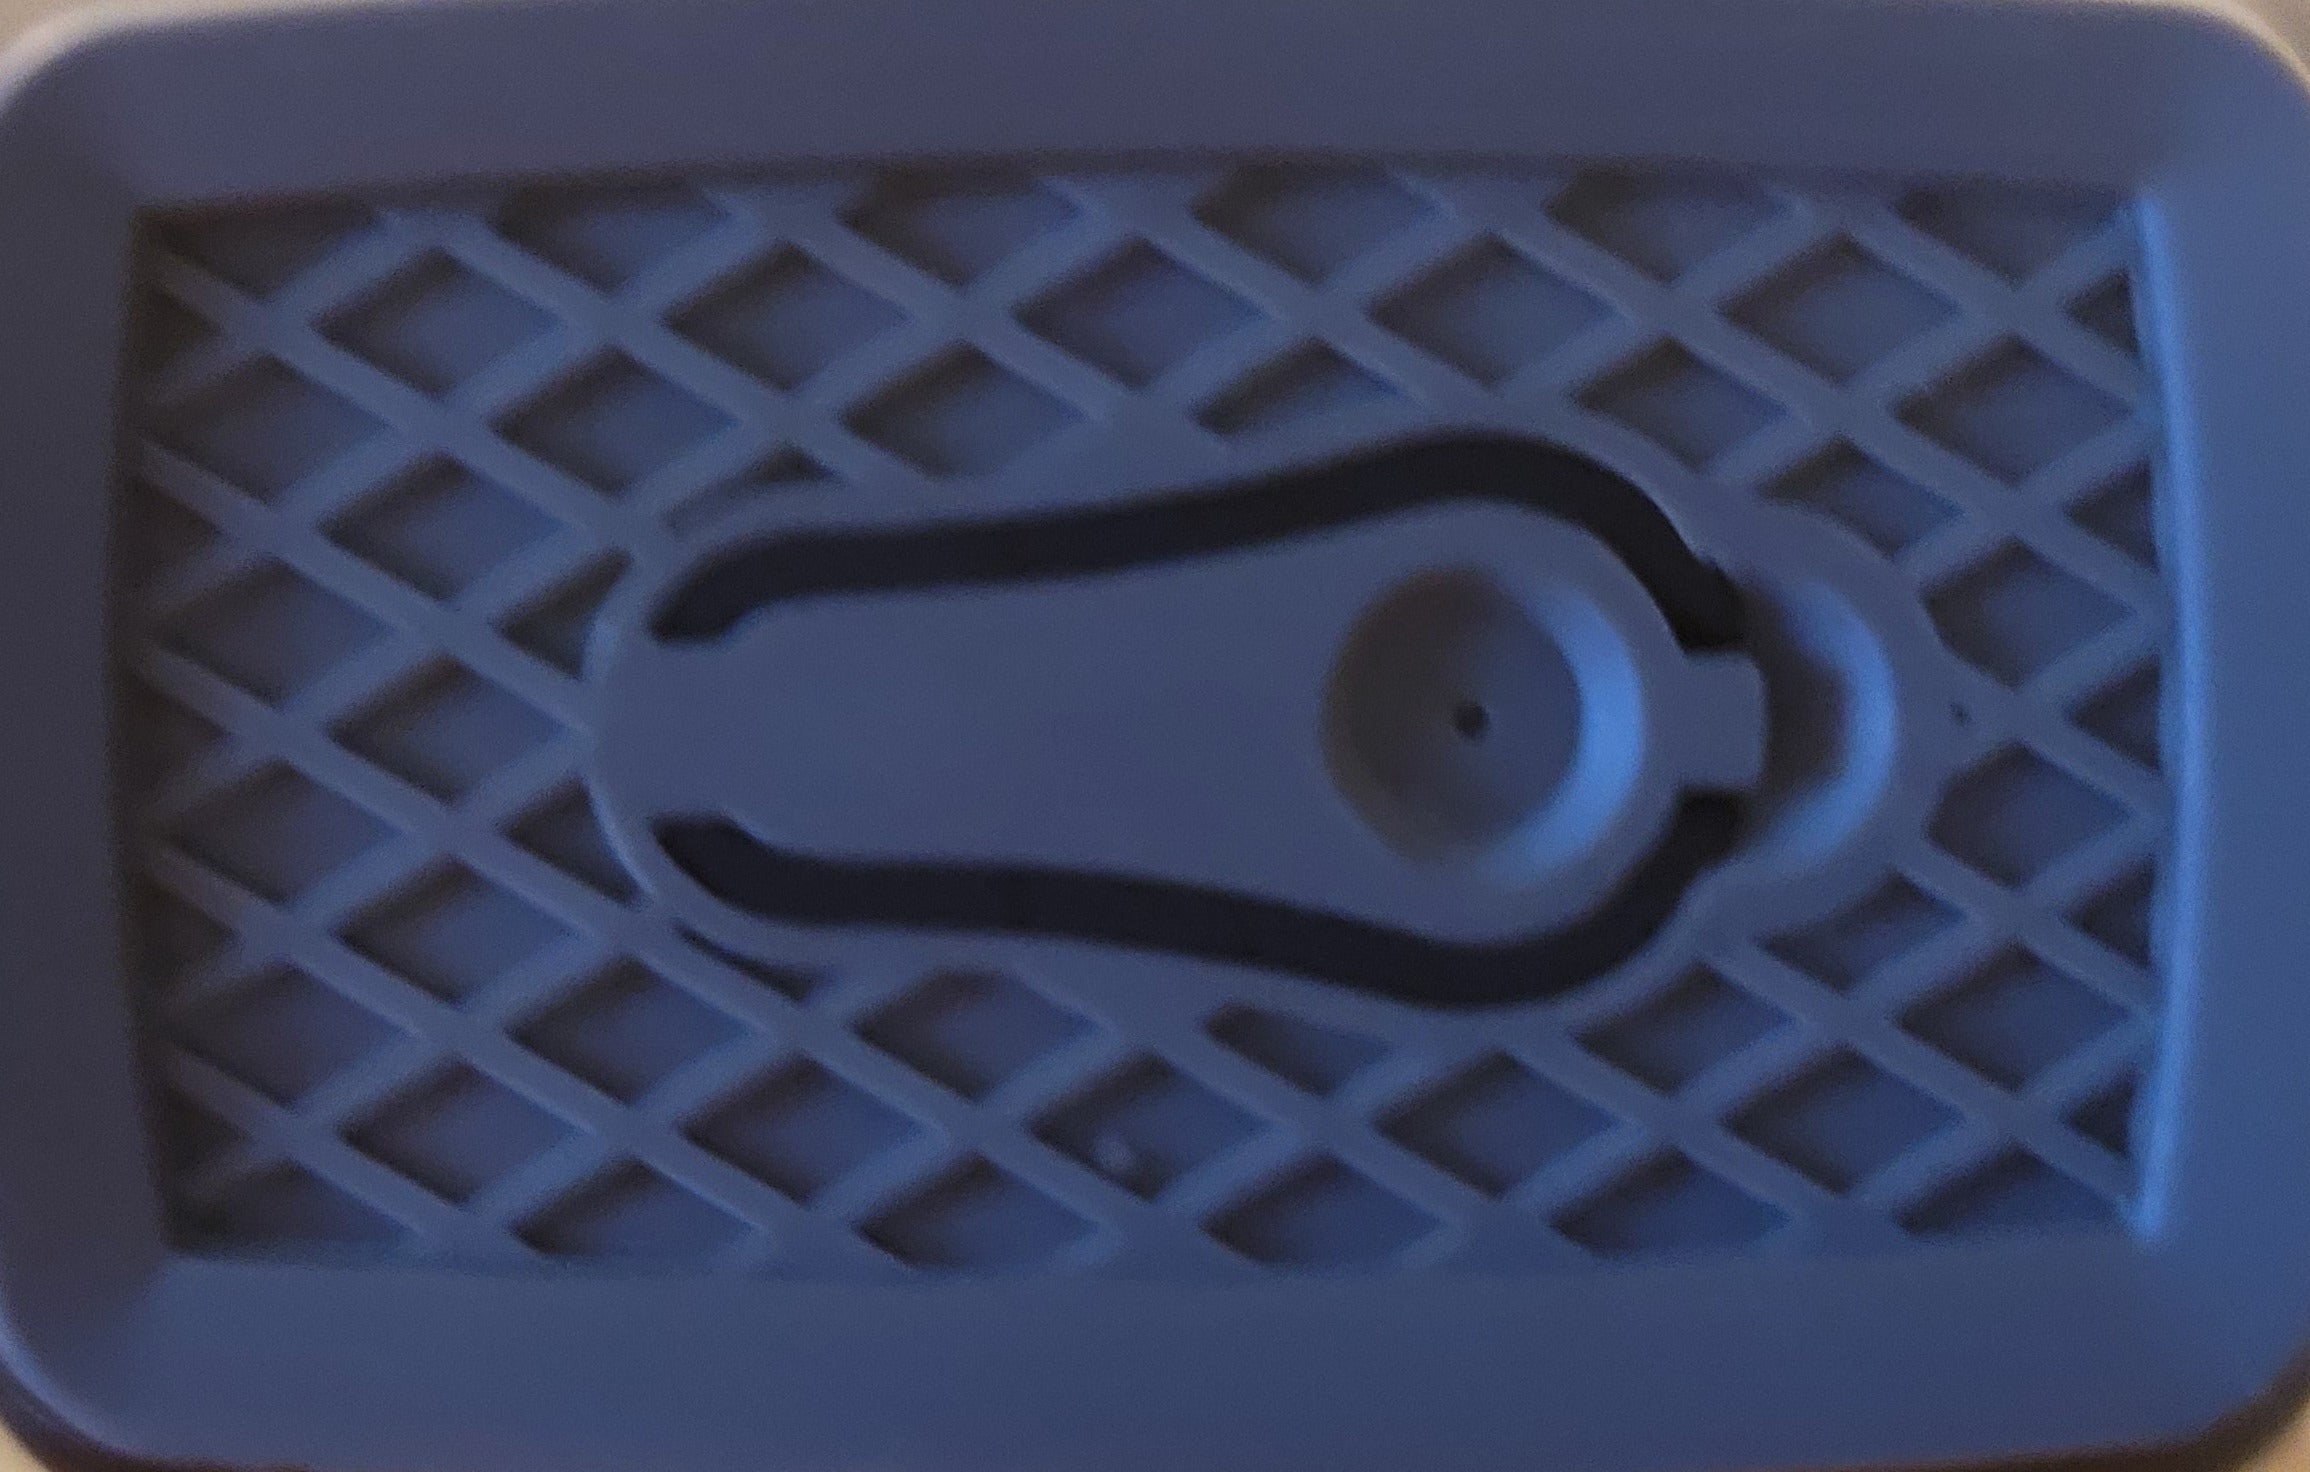
- Find the silicone drainage at the bottom of the unit.
- Open it to discard the wastewater.
- Close the drainage securely.
After these steps, your unit is ready for continued use.
To ensure proper hydration, aim to drink at least eight cups of water daily.
The unit's bottom lights indicate your water intake. After each Quantum Energy Hydrogen Water production cycle, a red light turns blue. This helps you track your daily water consumption. Try to change all eight red lights to blue each day.
For maximum benefits, drink your Quantum Energy Hydrogen Water within five minutes of each cycle.
The lights also serve as a handy tool to monitor your hydration progress. If you need to reset the count, press and hold the bottom power button for 5 seconds.

To clean the inside of your unit, use a soft-bristled brush with a long handle.
Clean as frequently as needed with only warm water—avoid cleaning agents and abrasive brushes to prevent scratches.
Never put soap or other cleaning products inside the device, and do not submerge it in water or place it in the dishwasher.
Optionally, you can use a solution of water mixed with vinegar or ascorbic acid for deeper cleaning. Always rinse thoroughly after cleaning.
Occasionally, your unit may require a reset, indicated by a continuous beeping sound from the bottom component.
Follow these steps to reset the device:
- Connect the unit to a power source using the charging wire and the bottom charging port.
- Press and hold the bottom start button while the device is charging until the beeping stops.
- Continue holding the button and unplug the device from the charger.
Your device is now reset and ready for use
We recommend drinking three to five cups daily for the first several days to allow your body to adjust (rapid detox can cause a headache side effect). Then increase to at least eight cups per day as recommended.
For best results, use natural spring water with healthy mineral content. If using alkaline water, do not use a Ph higher than 8.5 in the unit.
Do NOT use unfiltered tap water, as chemicals are usually used to treat the water that can harm both you and the device.
Use room temperature water only. Do not put hot or cold water into the device.
Do NOT drink directly from the device. Always pour the water into a cup and consume it within five minutes after the cycle is complete.
Take special care with the locking mechanism. Please always slide it up into the unlocked position when opening and closing the device.
Do NOT activate the device without water inside It can damage the mechanism and void the warranty.
Do NOT place anything other than water into the device.
Drink immediately after processing for maximum hydrogen value.
Do NOT place the device into the dishwasher.
Use the protective bag to protect the locking mechanism
Do NOT expose the bottle to direct sunlight.
Keep away from children.
Frequently asked questions
We recommend drinking at least eight cups of water a day, each containing eight ounces, which can be spread throughout the day. If you have any medical conditions, please consult your doctor before adjusting your water intake.
Yes, the water is safe to consume in any desired amount. However, individuals with medical conditions should consult a doctor before making any changes to their drinking habits. For those who are unwell, consuming at least eight cups or more daily is recommended to achieve the full therapeutic benefits.
The quantum water portable device lasts approximately three days for each charge when used 8 to 10 times daily.
For optimal results, we recommend using spring water or filtered water with a healthy mineral content. Remember, the quality of water you use directly influences the quality of water you drink.
It's advisable to consult with a healthcare professional before drinking Quantum Energy Hydrogen Water with medications. They can provide guidance based on your specific health conditions and the medications you're taking.
Yes. The Quantum Energy Hydrogen Water can be taken together with supplements. In fact, due to the high absorption of Quantum H2 water, the performance of the supplements will be enhanced.
The time it takes to experience results from drinking Quantum Energy Hydrogen Water can vary depending on individual health conditions, hydration levels, and lifestyle. Some people might notice benefits such as increased energy or improved hydration relatively quickly, within a few days to a week. Others may need a longer period of regular consumption to observe significant effects. It's important to maintain consistent use to see the best results.
Quantum Energy Hydrogen Water is generally considered safe and does not typically produce adverse side effects. However, as with any change in your diet or hydration habits, it's advisable to monitor how your body responds and consult with a healthcare professional if you have any concerns or underlying health conditions.
The warranty covers all products for a period of one year.
Video
Video

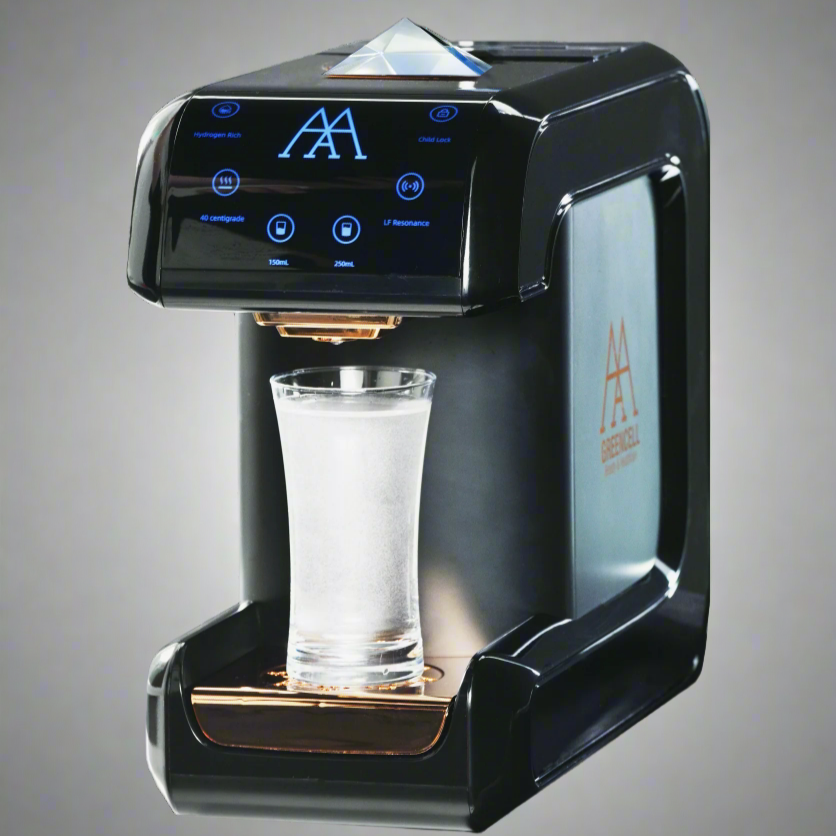
Since the countertop unit is new to the United States, it comes with a British Type G plug and operates at 220 voltage, not the standard US Type B plug or 110 voltage. A step-down transformer is required to ensure compatibility.
Setup Instructions:
Connect the transformer to a US outlet and turn it on by pressing the button on top.
Plug the countertop unit into the transformer. The unit should power on immediately and greet you with a motion-sensor voice.
Additional Notes:
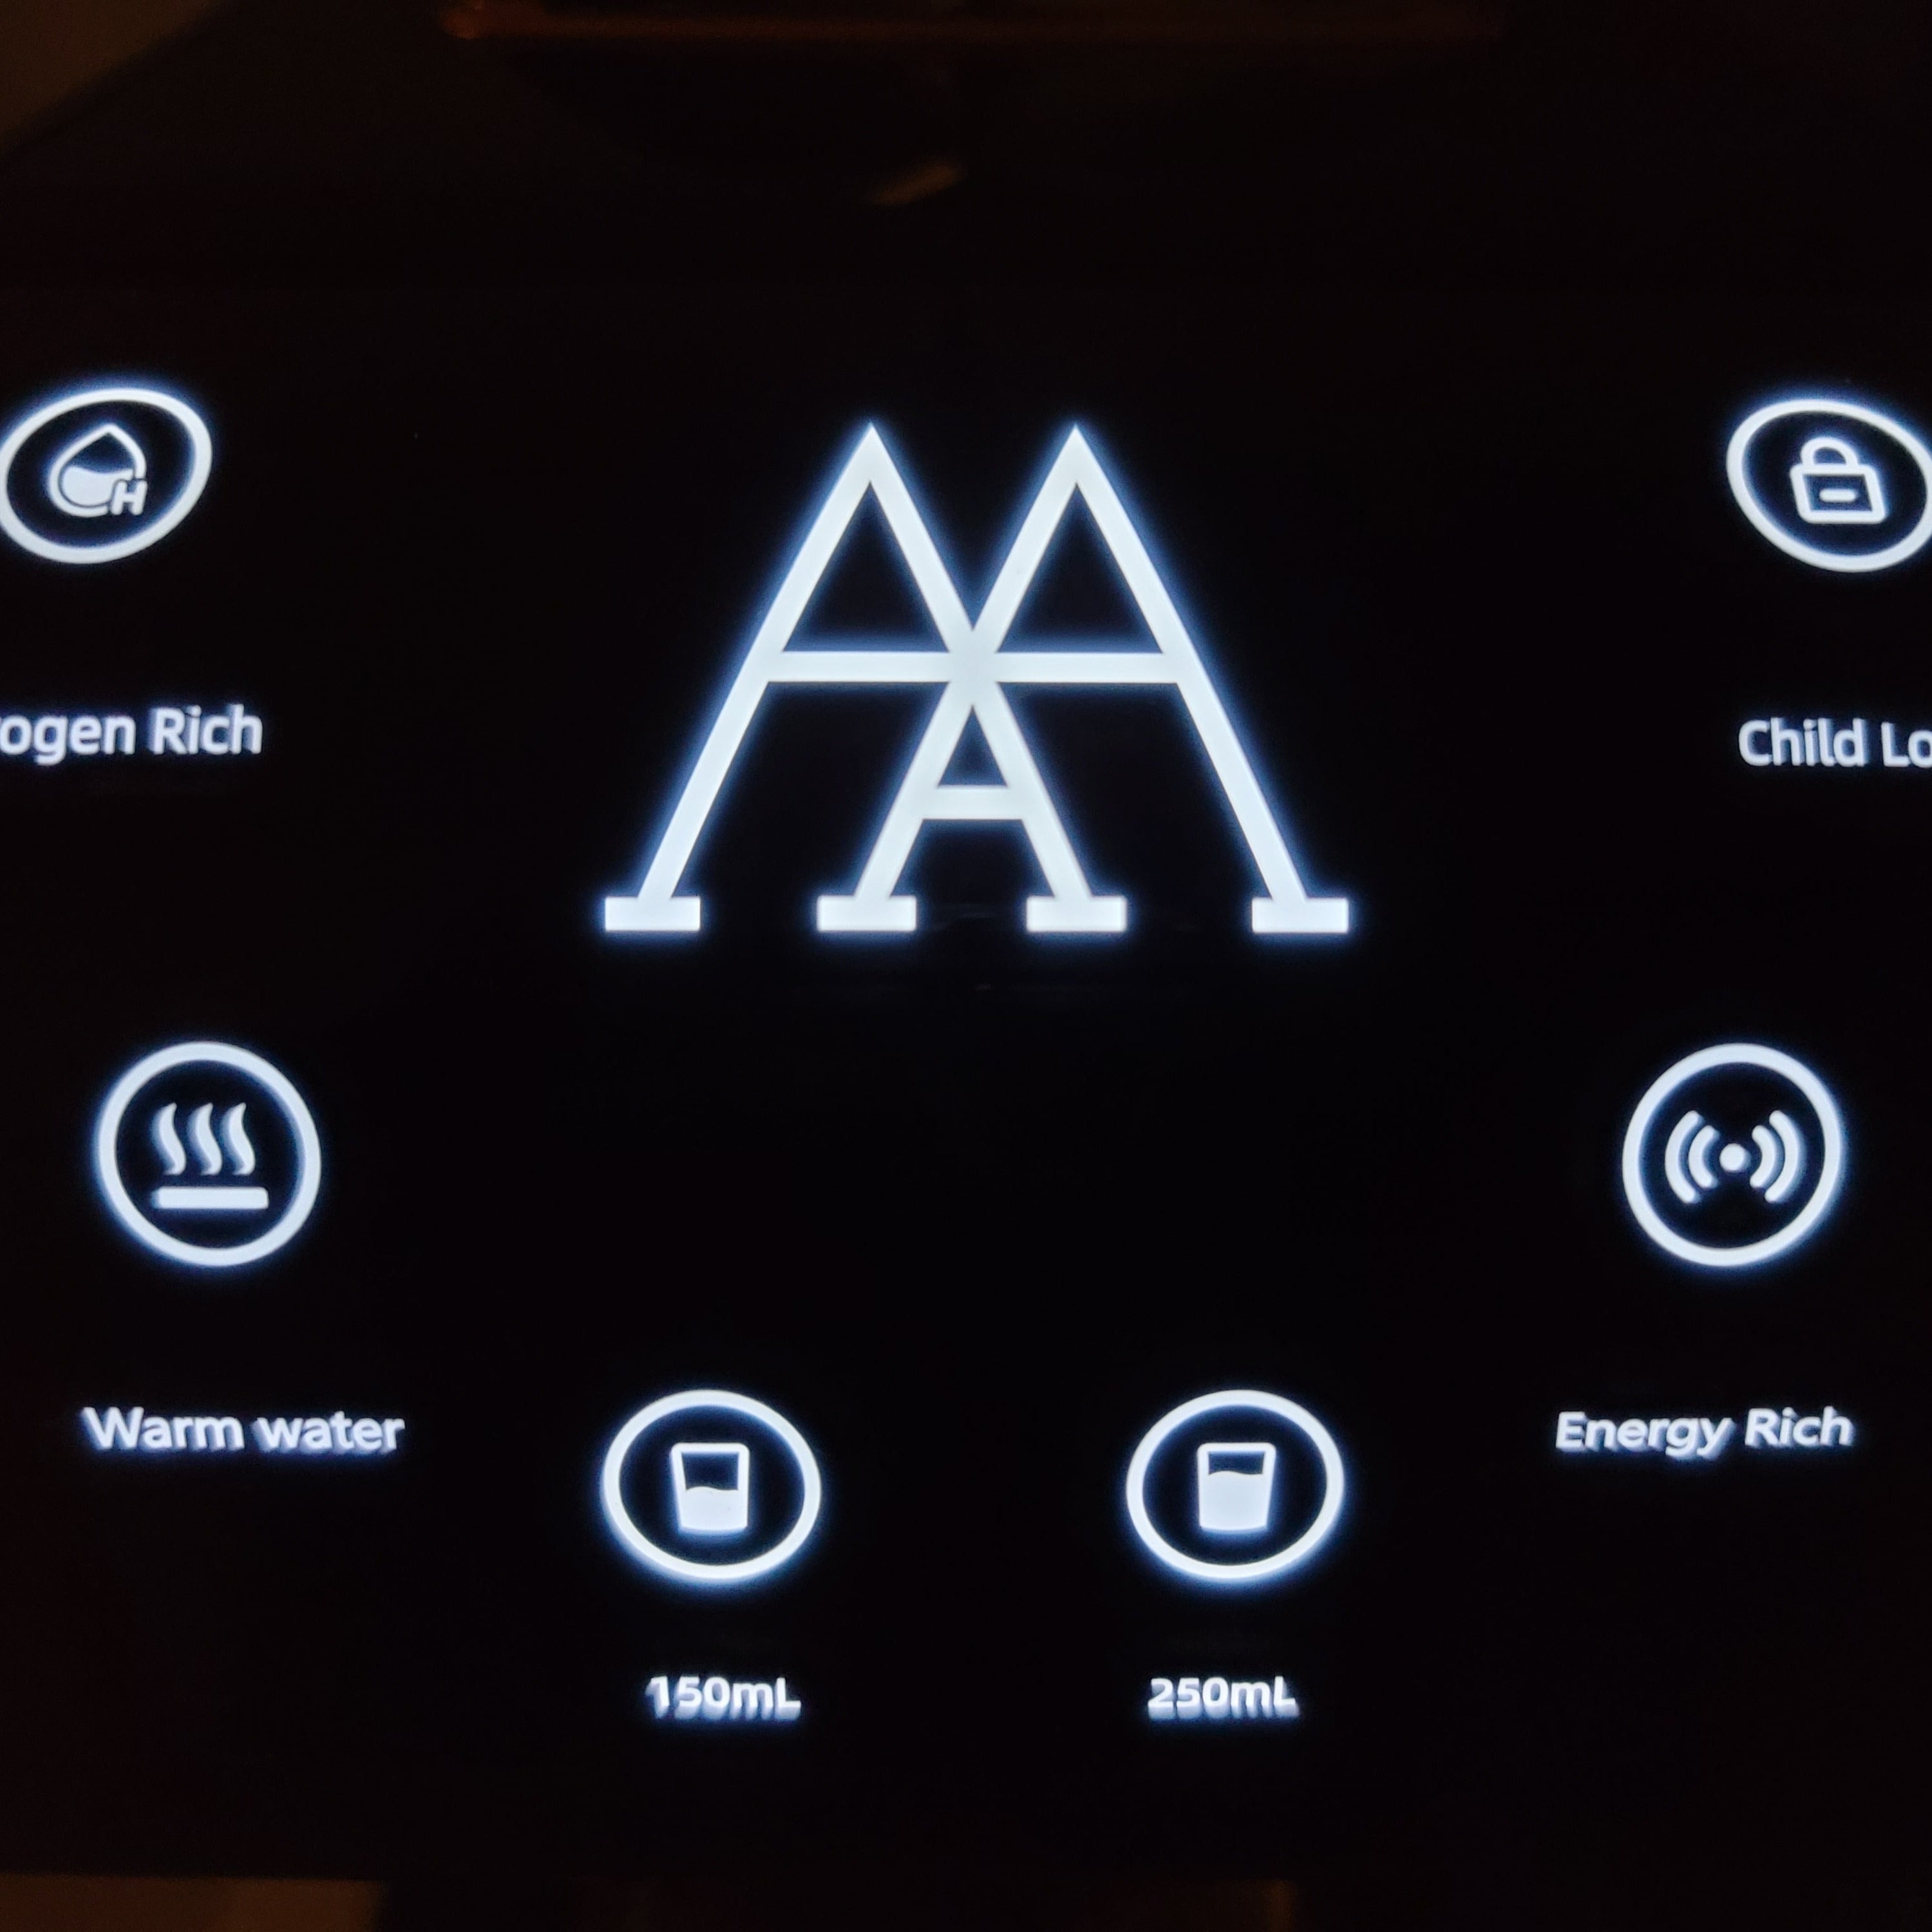
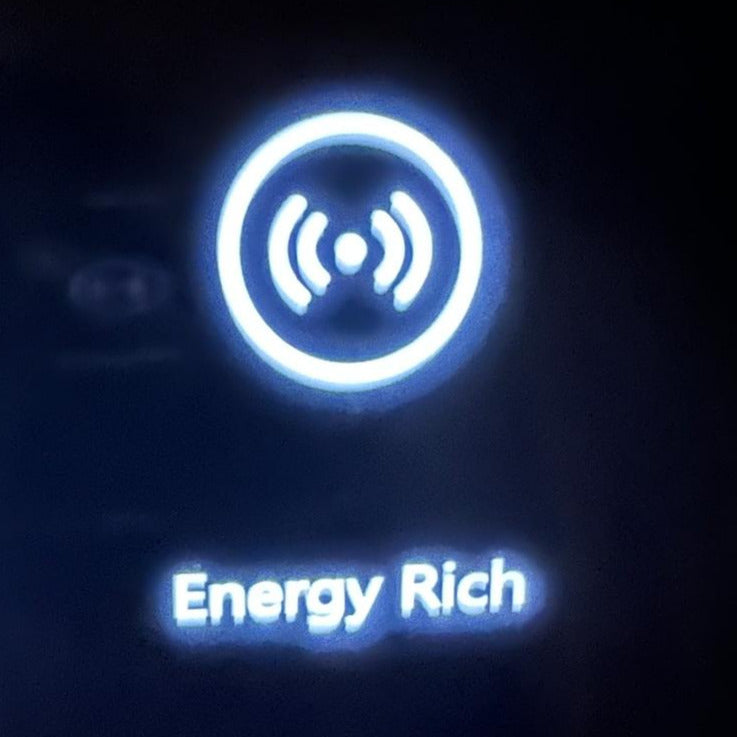
Silencing the Voice: To silence the motion-sensor voice, press and hold the “Energy-Rich” button for three seconds until you hear a beep. This voice also provides error messages, so reactivate it if the unit malfunctions to diagnose issues.
Child Lock Feature: The unit automatically locks after several minutes of inactivity. To unlock, wave your hand near the display to wake it, then hold the red “Child Lock” button on the upper right until the panel lights up fully, indicating it is unlocked.
Powering On: The unit powers on automatically when connected to an outlet, as it does not have a manual on/off switch.
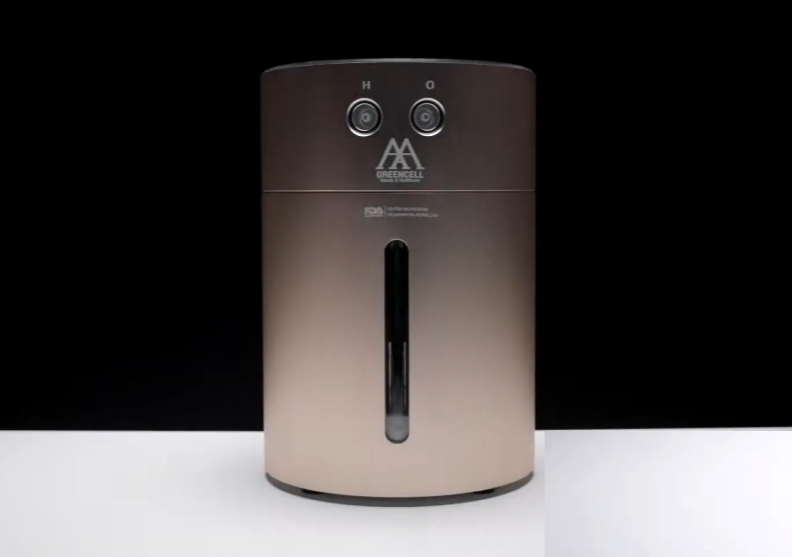
Reservoirs:
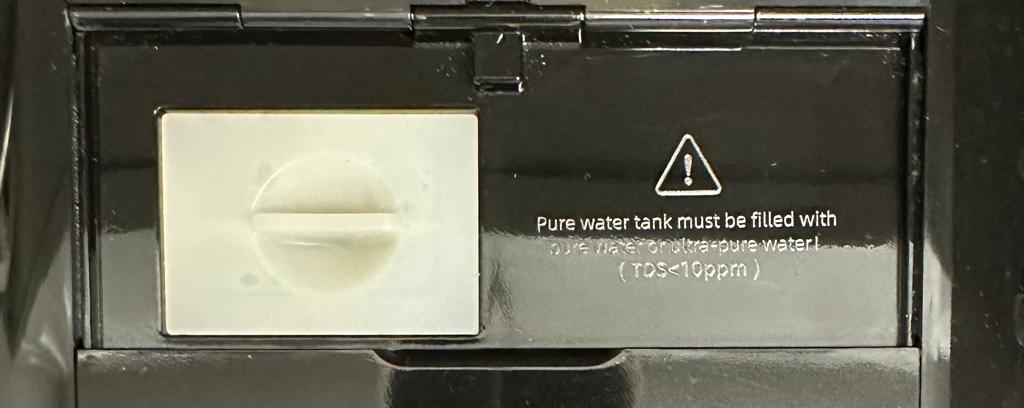
Internal Reservoir: Located at the top, it is for distilled water only (distilled, RO, or TDS under ten recommended). Open the lid, remove the white rubber cap, fill to the top of the gray area with distilled water, and replace the cap. Drain and replace this water monthly for optimal performance.
External Reservoir: Located at the rear, it has a two-liter capacity for warm tap water. This water is used to prime the machine and should be discarded after running through the unit once.
Operation:
Fill both the internal and external reservoirs as directed.
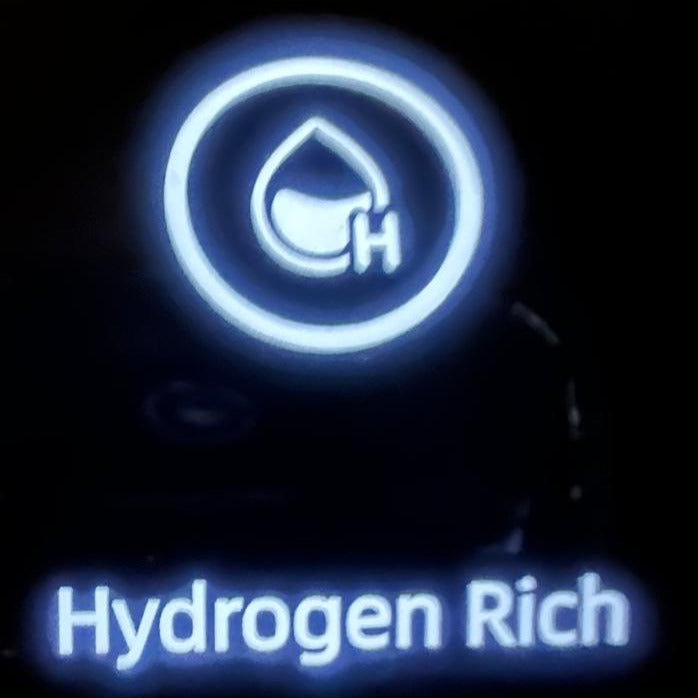
To prime the unit, press the “Hydrogen Rich” button on the upper left. Prepare a container to catch the output water.
Allow the water to run through the unit until the rear reservoir is empty, then press the “Hydrogen Rich” button again to stop the flow.
Discard the used warm water.
Your unit is now ready for regular use. This initial setup should be repeated if the unit has not been used for an extended period.
Filling the Reservoir:
Fill the rear reservoir with room-temperature natural spring water up to the fill line, then securely lock it into the unit. While most filtered waters are acceptable, ensure they retain essential minerals. Avoid using highly purified options like Reverse Osmosis, distilled, or "Zero" filtered water as they lack beneficial minerals. Also, do not use high alkaline water or any water with a pH higher than 8.5.
Operating the Unit:
Unlock the unit by pressing the child safety button.
Start the water processing by pressing the "Energy Rich" button, which will light up red and initiate a 15-minute light display on the pyramid indicator. The process is complete when the pyramid lights turn off and the "Energy Rich" button is no longer red.
Additional Guidelines:
Run the "Energy Rich" process each time you refill the tank.
Use only room-temperature water in the reservoir.
Do not place any liquid other than natural spring or properly filtered water into the unit.
Ensure the unit is never activated without water inside to avoid damaging the mechanism and voiding the warranty.
Following these steps ensures optimal performance and longevity of your device..
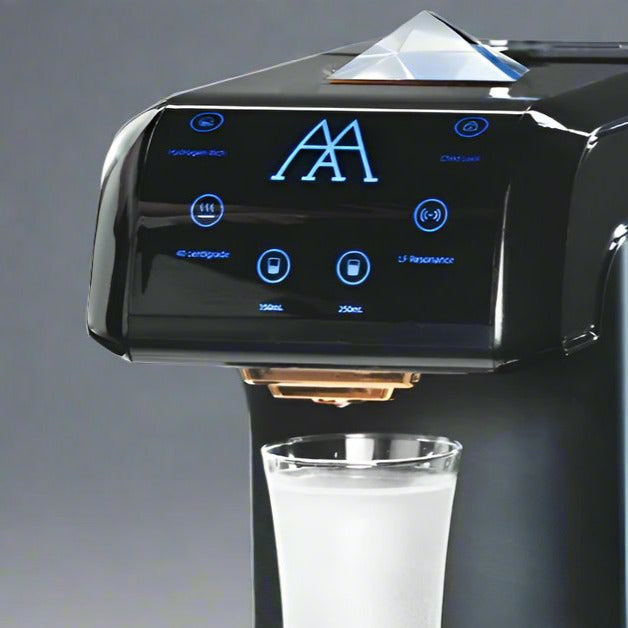
Congratulations. You have successfully processed your Quantum Energy Hydrogen Water and are ready to drink. You have several options.
You will notice there are several remaining buttons. You will use these buttons to produce your drinking water for consumption. Here is an explanation for each.
“150 ml” - this button delivers a pre-set 150 ml of water (Approximately 5 ounces). Place your glass under the front spout and press the button to activate. It will produce 150 ml of Quantum Energy H2 Water and then turn off automatically.
“250 ml” - this button delivers a pre-set 250 ml of water (Approximately 8.5 ounces). Place your glass under the front spout and press the button to activate. It will produce 250 ml of Quantum Energy H2 Water and then turn off automatically. This will likely be your most commonly used button.
“Hydrogen Rich” - this button acts as an on/off button to produce a continuous Quantum Energy H2 Water flow. Place your glass under the front spout and press the button to start the flow of drinking water. Press the button again to stop the flow when the desired amount has been expelled.
“Warm Water” - this button acts as an on/off button to produce a continuous Quantum Energy H2 Water flow of warm water for coffee or tea. Place your mug under the front spout and press the button to start the warm Q H2 drinking water flow. Press the button again to stop the flow when the desired amount has been expelled.
Important Note: The Hydrogen Rich and Warm Water buttons provide a continuous flow and require you to press again to stop the flow when desired. Only the 150 ml and 250 ml buttons offer preset amounts with an auto-shut-off feature.
Important Note: The “Energy Rich” process should be run each time you refill the reservoir tank. However, it does not need to be run before drinking each time. It will depend on your water consumption and how often you need to refill your tank. You can run this once or several times daily when refilling the reservoir.
Important Note: If you have drinking water that was processed once remaining in the rear reservoir that has sat overnight, feel free to press the “Energy Rich” button again in the morning to re-process it. It’s recommended to re-process your water to recharge it when appropriate.
Do NOT use cold or hot water in the device. Water must be at room temperature only.
We recommend natural spring water for the best results.
Do not use water with a Ph higher than 8.5 in the unit.
Do NOT put any liquids besides natural spring or filtered water into the unit.
Daily Hydration Recommendation:
As a general guideline, aim to drink at least eight cups of water daily to maintain proper hydration.
Initial Adjustment Period:
Start with three to five cups of water per day during the first few days. This gradual introduction helps your body adjust and can prevent headaches often associated with rapid detoxification.
Gradual Increase:
After the initial period, increase your intake to the standard recommendation of at least eight cups per day.
Personalized Hydration:
While eight cups is the minimum, there's no set maximum. Tailor your water intake based on your individual needs and comfort.
These steps ensure a balanced approach to hydration and health.
We recommend changing the distilled water in the internal reservoir monthly as a best practice to help maximize the life of your machine.
Here are the steps to take to perform this maintenance.
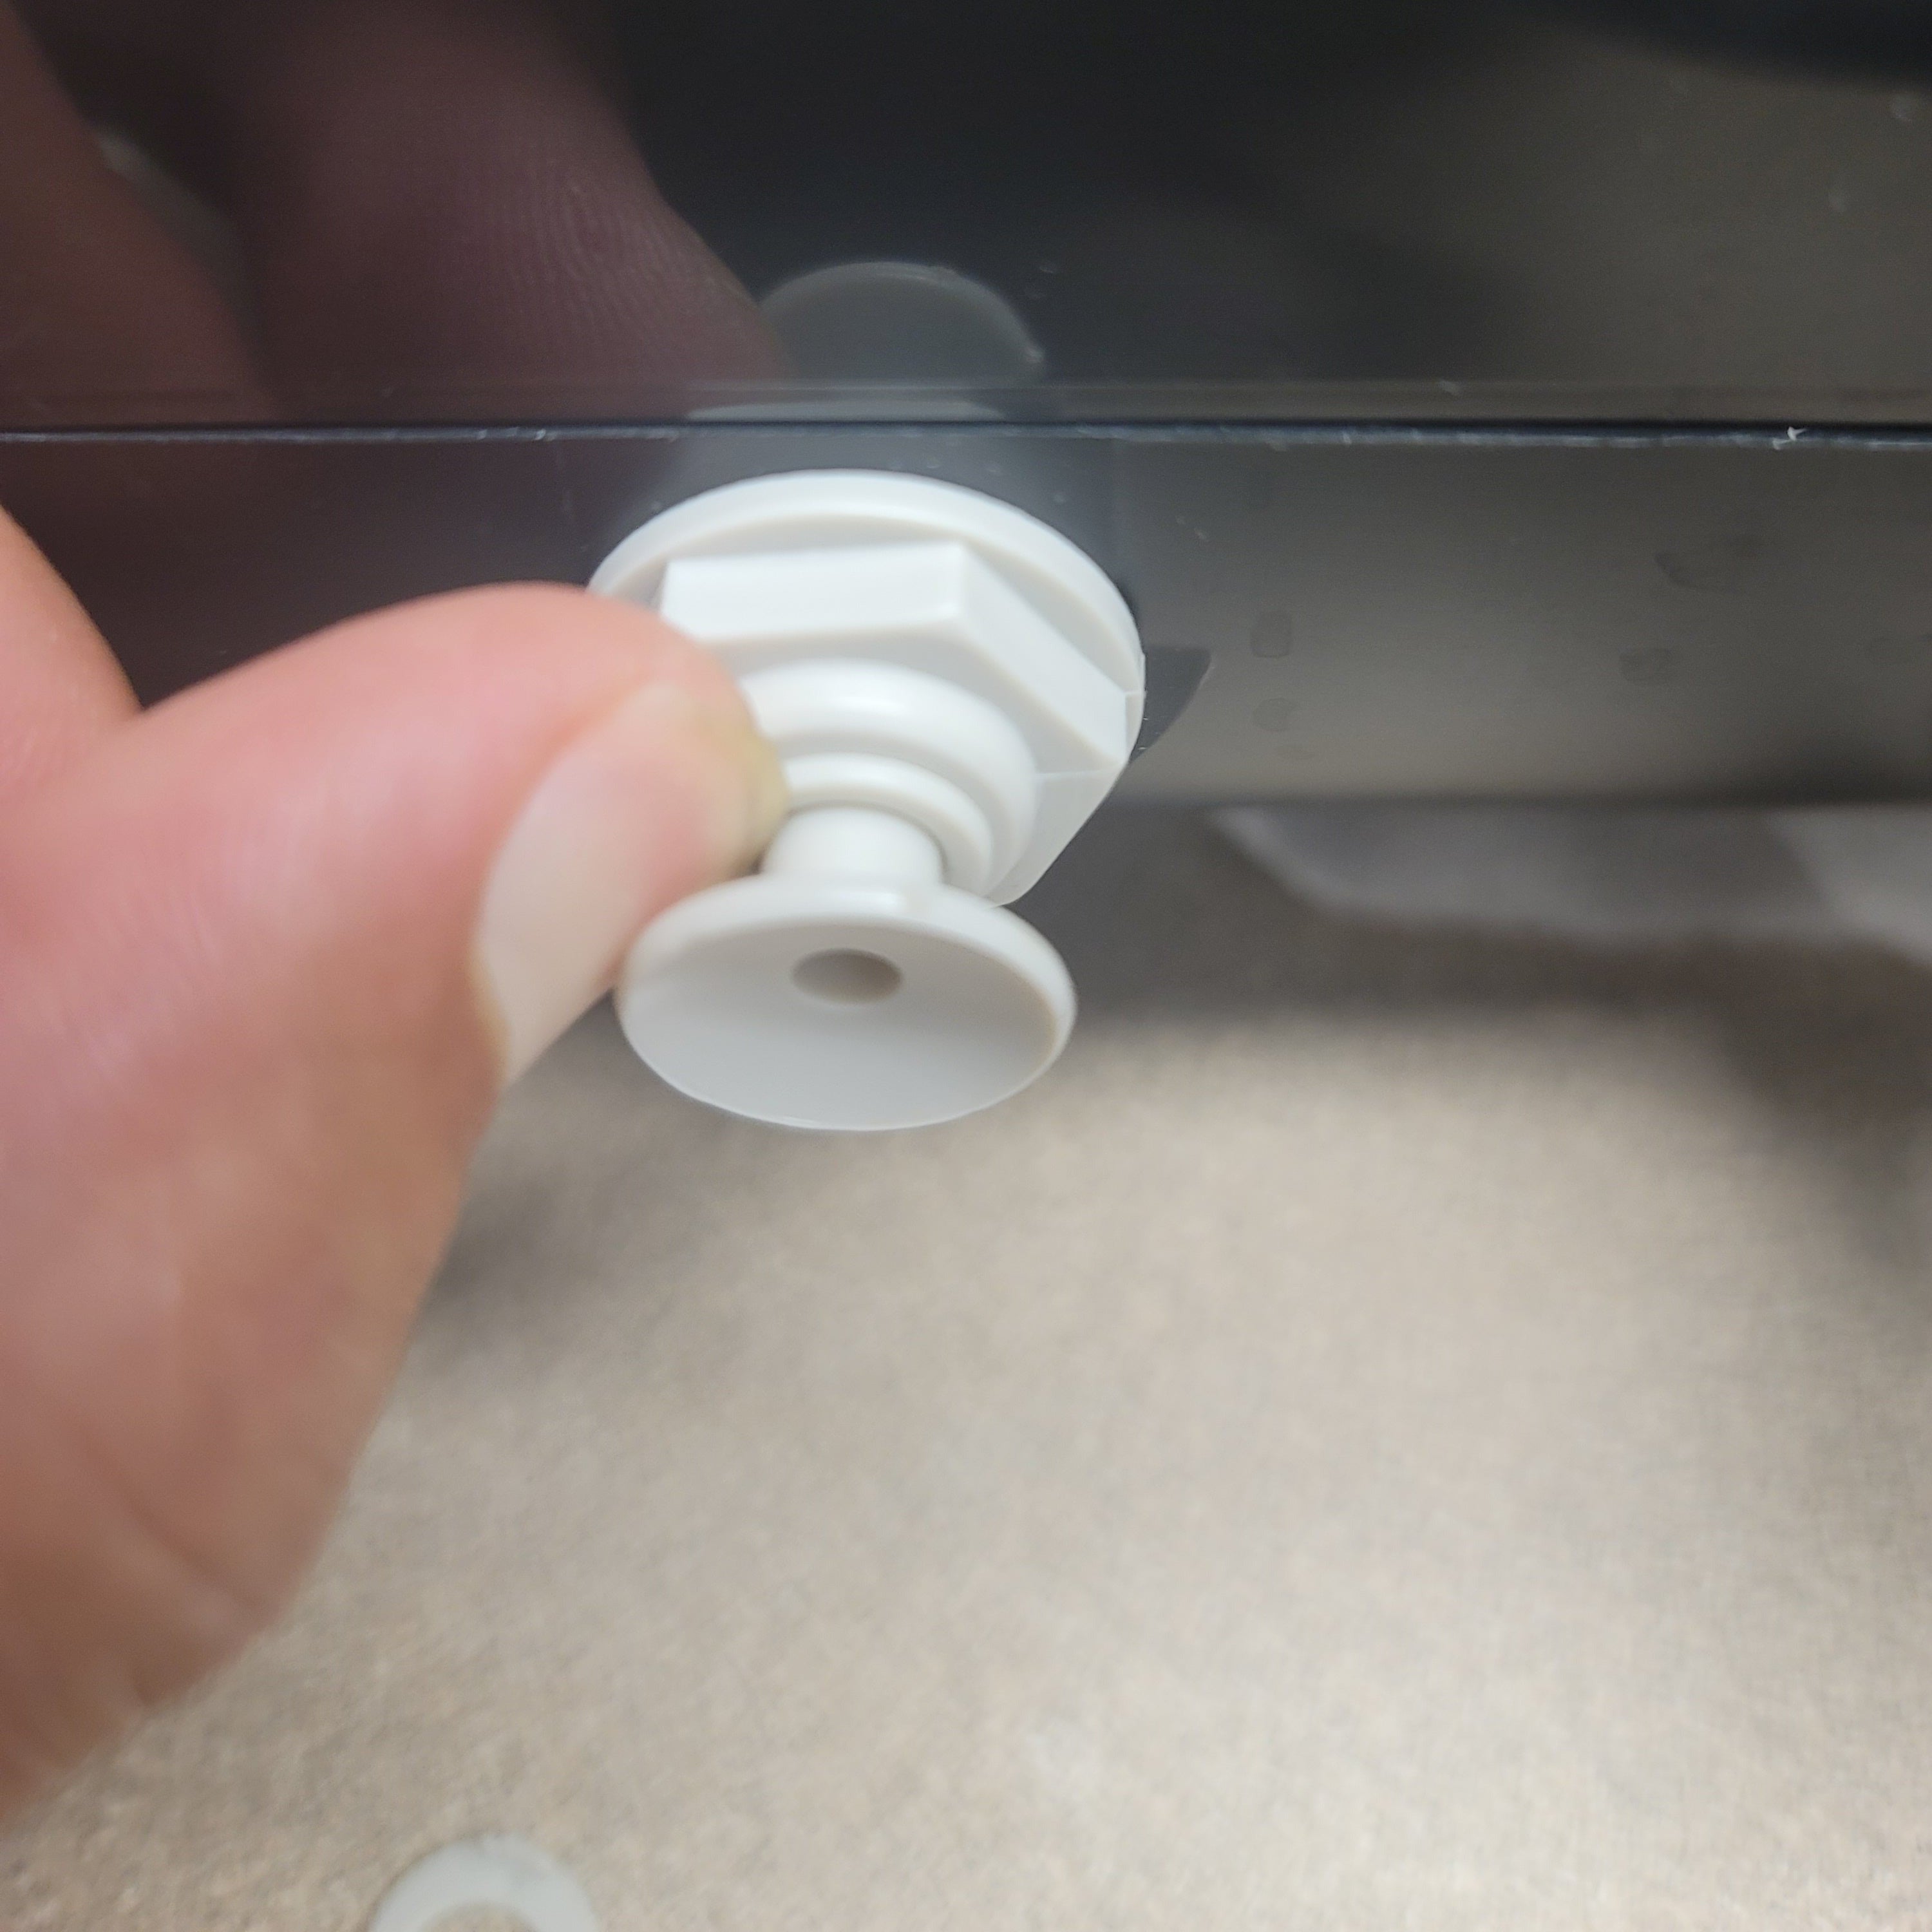
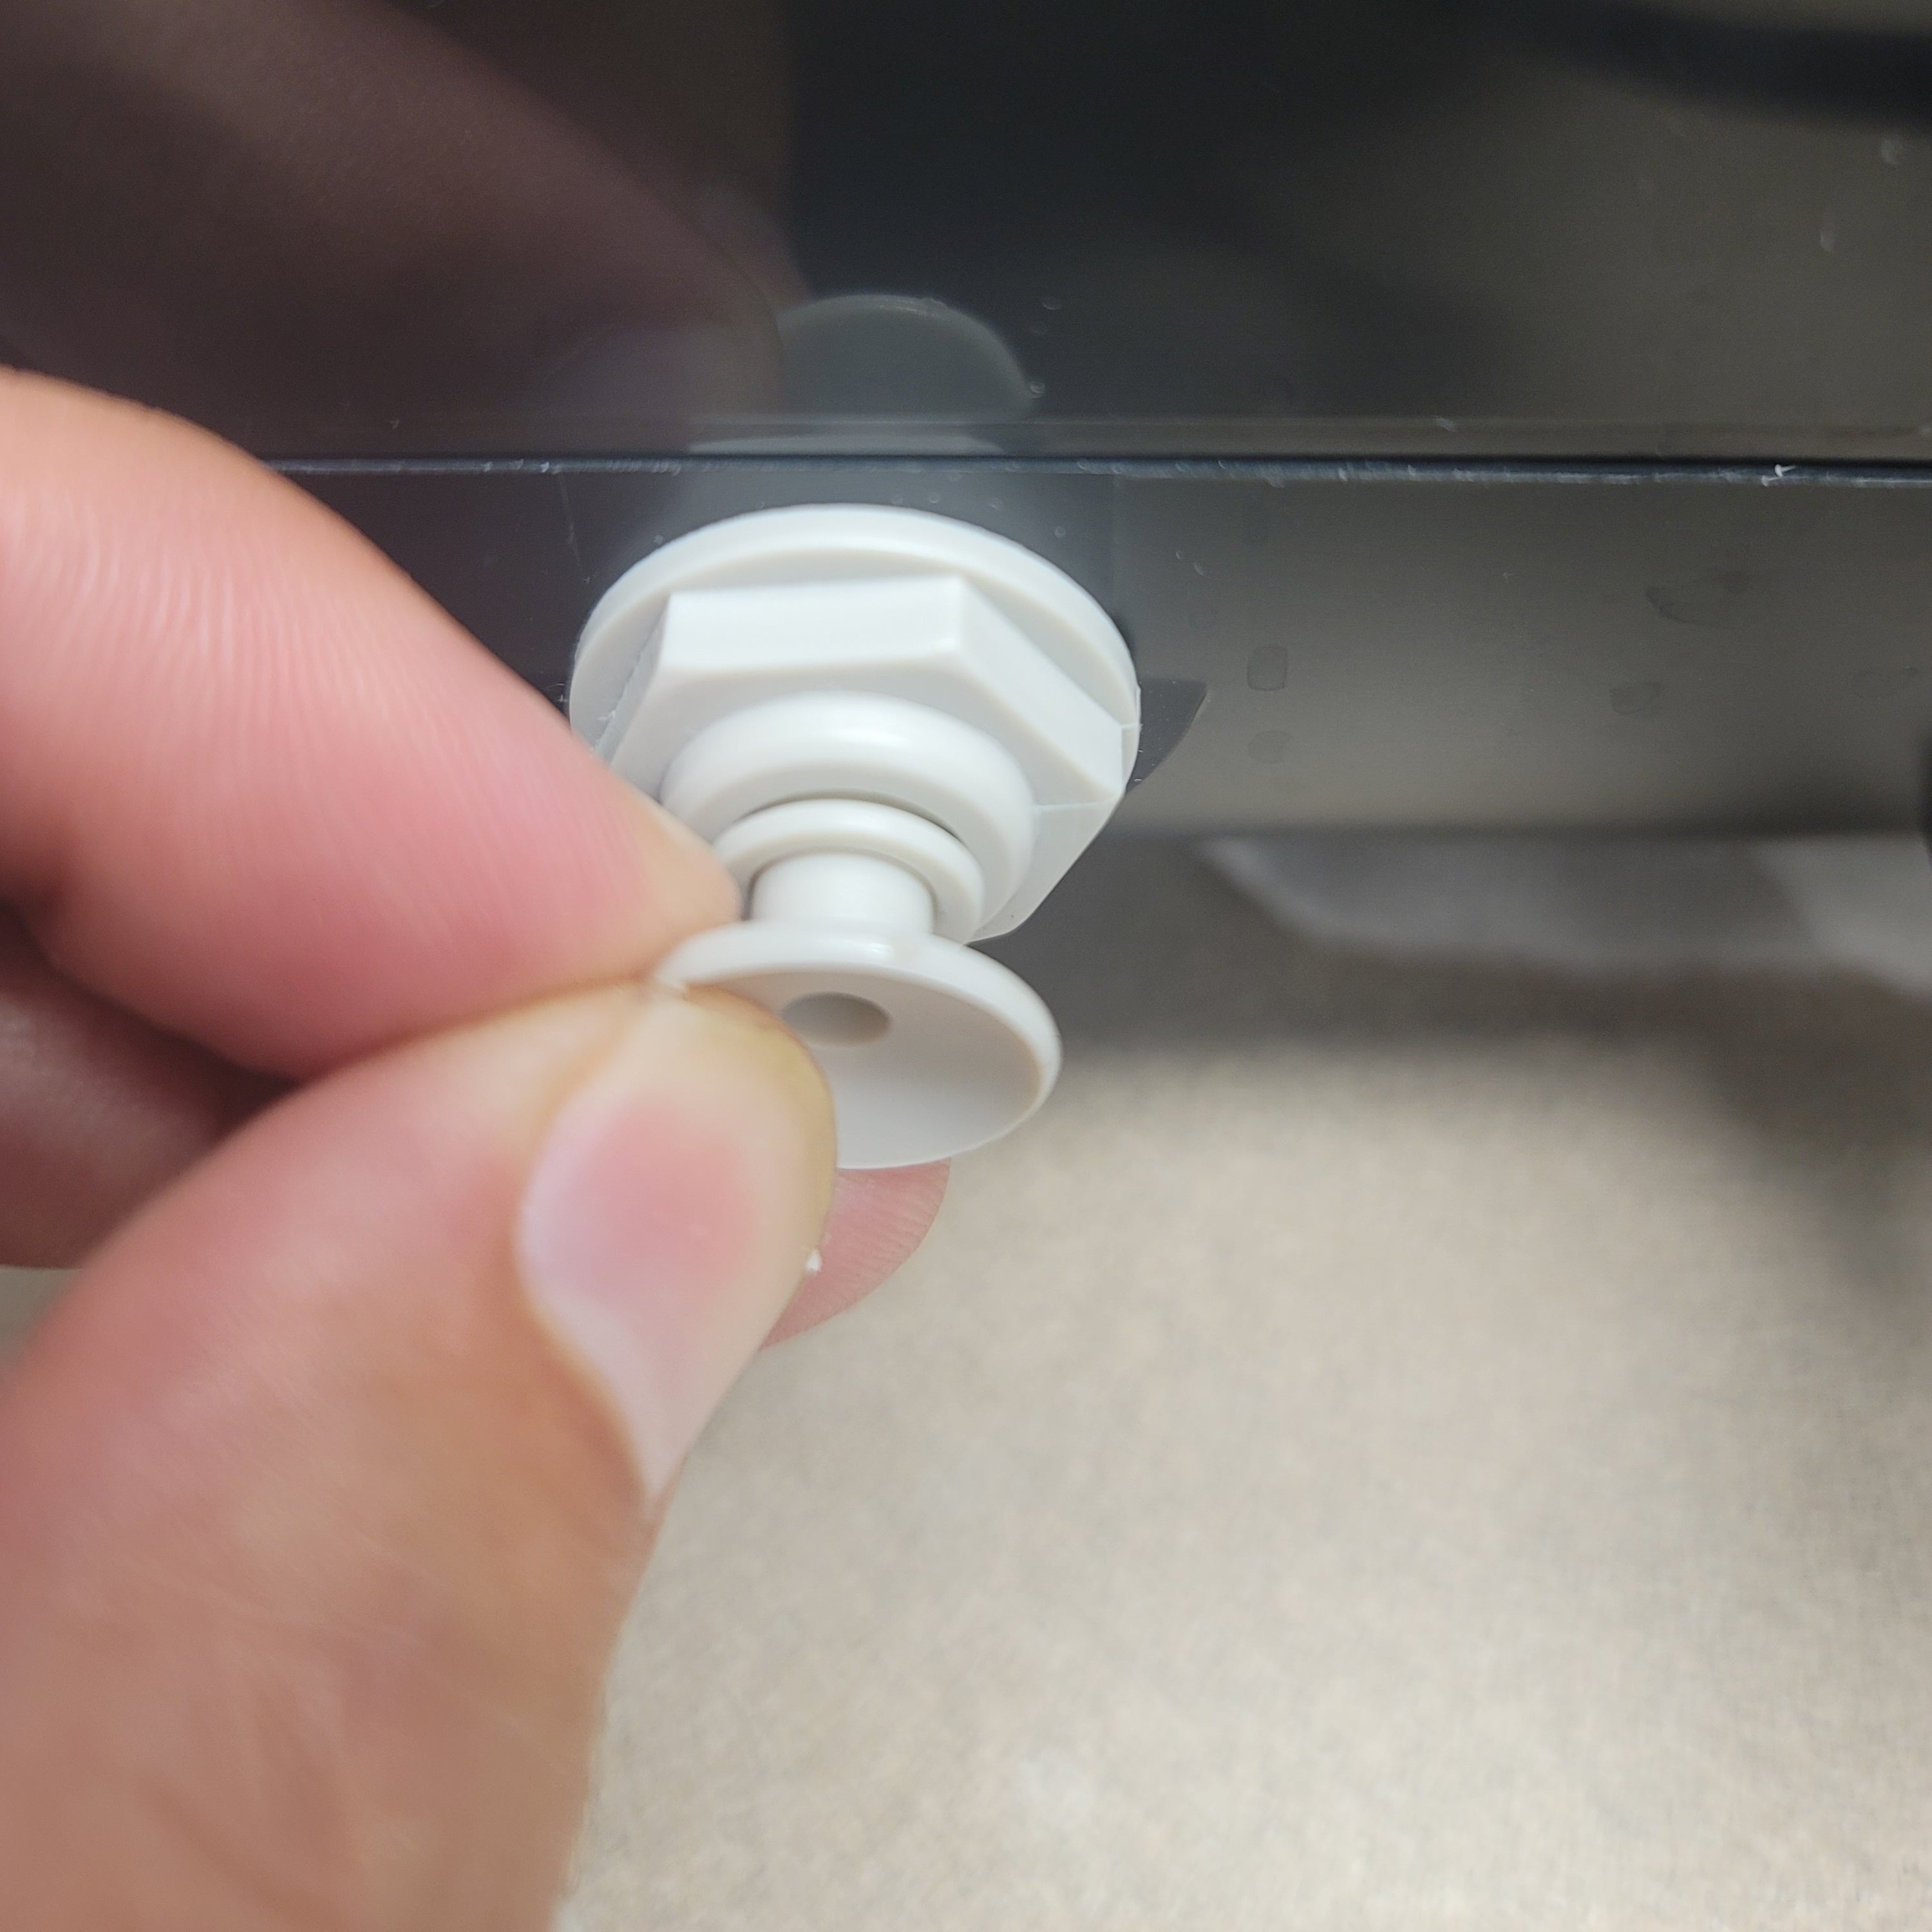
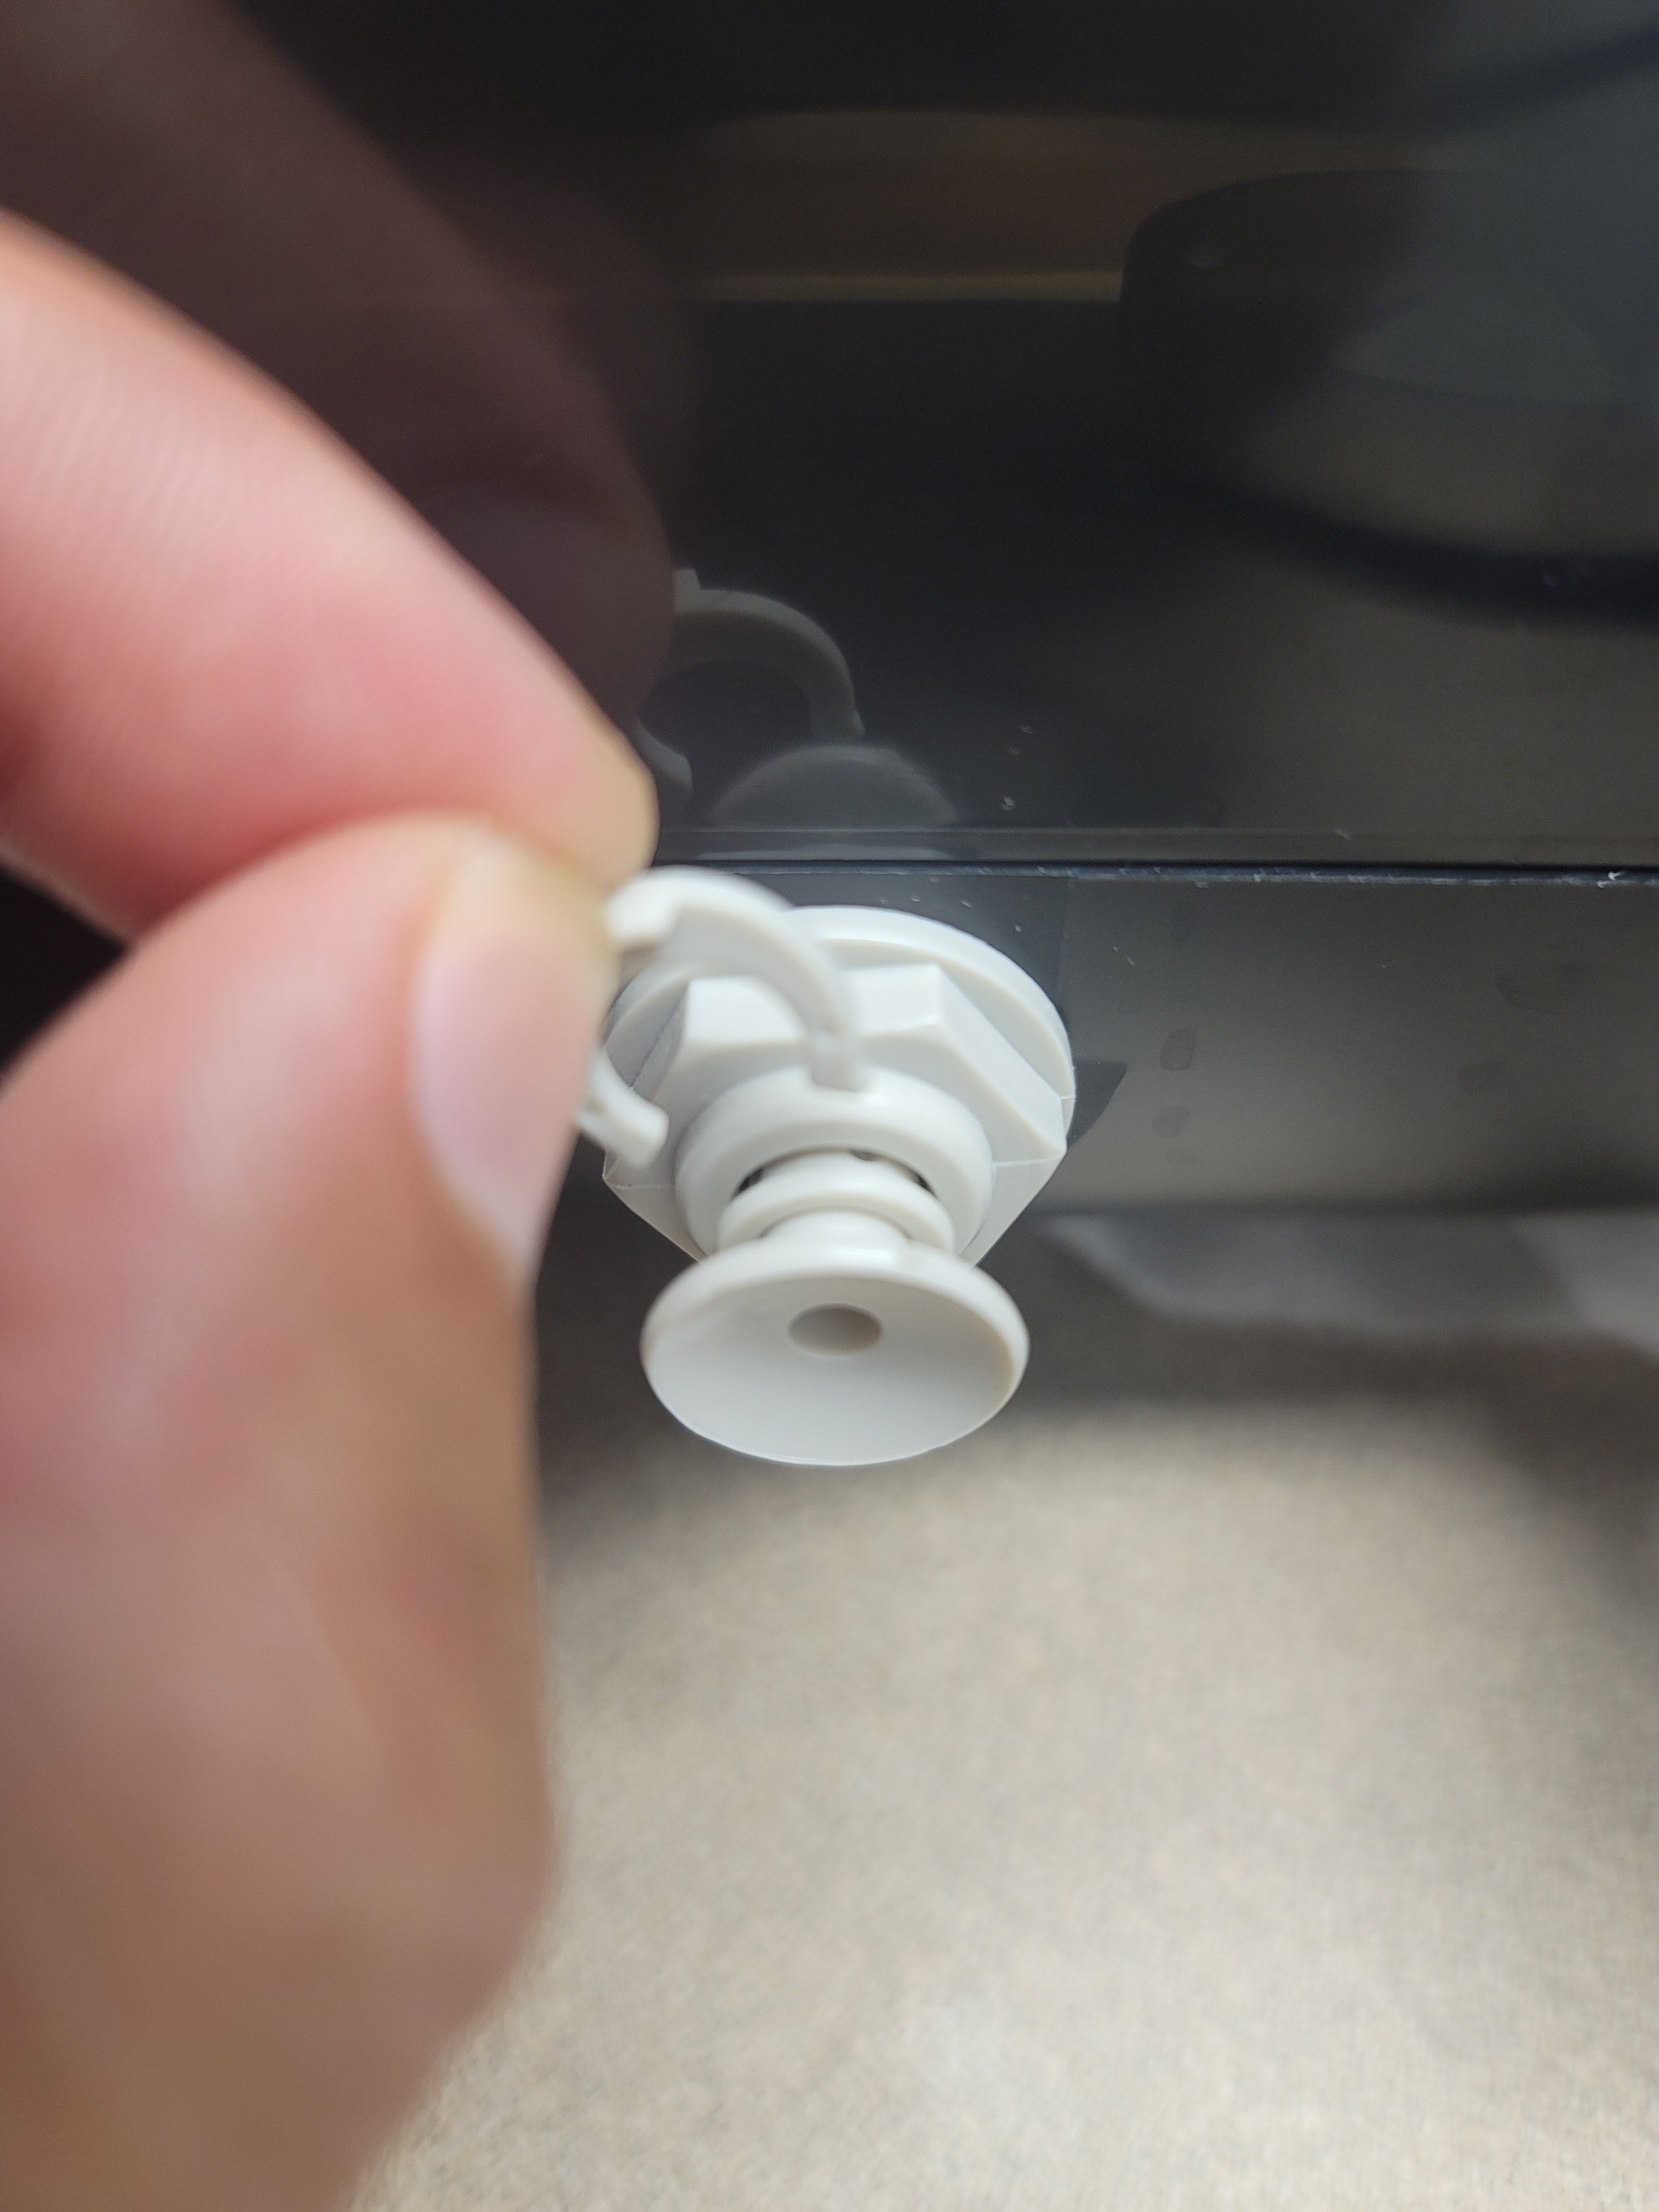
Step 1. Locate the small white plug on the bottom back of the machine below the rear reservoir. Removing it allows the water to drain from the internal reservoir.
Step 2. Locate and remove the small gray round clip lock and set it aside.
Step 3. Place a container under the spout for the water to flow into when you remove/open it.
Step 4. With your thumbnail, push the inside round locking mechanism so it’s flush with the nut and, at the same time, pull out the plug stopper. You should feel it unlock and release. If it’s not releasing, push the locking mechanism (that the plug is inserted into) toward the machine.
Step 5. After removing the plug, the water will flow into your container. Let it flow until empty, and discard.
Step 6. Replace the plug and return the small round clip to its original place to secure it.
Step 7. Refill the internal reservoir with fresh distilled water as described in the earlier section on “Priming The Unit”.
The rear drinking reservoir is dishwasher safe. It should be removed from the unit and cleaned separately. Feel free to use soapy water (on the drinking water reservoir container only) or run through the dishwasher as needed.
Do NOT use an abrasive brush to avoid scratching the unit or plastic reservoir.
Do NOT put any soap or cleaning products into your device.
Do NOT immerse your unit in water or place your unit in the dishwasher.
Fill the rear reservoir with a mixture of water and either vinegar or citric acid and run it through the machine to clean as needed. Process warm tap water through the machine to rinse thoroughly. We recommend doing this at least once per year.
We recommend drinking three to five cups daily for the first several days to allow your body to adjust (rapid detox can cause a headache side effect). Then increase to at least eight cups per day as recommended.
For best results, use natural spring water with healthy mineral content. If using alkaline water, do not use a Ph higher than 8.5 in the unit.
Do NOT use unfiltered tap water, as chemicals are usually used to treat the water that can harm both you and the device.
Use room temperature water only. Do not put hot or cold water into the device.
Do NOT activate the device without water inside the reservoirs. It can damage the mechanism and void the warranty.
Do NOT place anything other than water into the device.
Drink immediately after processing for maximum hydrogen value.
Do NOT place the device into the dishwasher.
Keep away from children.